Wednesday, March 9, 2011

Mr. Blue Bird on My Shoulder


One thing that you will soon learn about me is my obsession with birds.  Don't get me wrong, my house is not filled to the brim with bird-themed paraphernalia...yet.  In an attempt to increase said bird-themed paraphernalia, I decided to create my own bird figurines.  I had seen some at Michael's last week and began brainstorming how to sculpt a bird.  Soon I was remembering third grade paper mache projects and realized how much more paper mache can do besides sculpt the solar system.

While I was googling a recipe for paper mache, I stumbled across a recipe for salt dough as well. My head spun out of control at the choice I had to make - flour and newspaper or flour and salt? Like with any major decision, I said, "Screw it - let's try both!"


Salt Dough Recipe: 
(adapted from Arts and Crafts Ideas)
                                                                  - 1 cup of salt
                                                                  - 2 cups of flour
                                                                  - 3/4 cup of lukewarm water

Mix the salt and flour together. Then add the water and mix until a ball has formed. Knead for 5-10 minutes or until dough is smooth and non-flaky. The quality of dough you finish with will depend on the time spent on kneading.

Paper Mache Recipe: 
(adapted from about.com)
                                                                  - 1 cup flour
                                                                  - 2 cups water
                                                                  - teaspoon of salt

Mix well until all lumps are gone. Consistency should be that of thick glue...you may need to add more flour or water to achieve the right consistency.  The salt helps prevent molding.for those who live in high humidity climates.

I began my zippity doo da day of bird making (for those who don't get the reference, it goes along with my title) with the salt dough.  After mixing up a batch of dough - I cut mine in half since this was an experiment - I got to work sculpting.  Word of caution: I am not a sculptor, artist, or person-who-claims-they-aren't-good-but-really-are (you know who I'm talking about).  That being said, I had a failed attempt and a successful attempt with the salt dough. Let me illustrate:

salt dough diy bird

As warned in the recipe, you really must knead this well in order to achieve a smooth, flexible consistency. I found I needed to add a few drops of water to lubricate things. After the dough was where I wanted it, I took two clumps and shaped them into egg shapes.

diy salt dough bird

My though process was that the larger egg would be the body and the smaller one would be the head. I thought I could just use a skewer to connect the head to the body. You'll also notice I cut out a beak and tail from cardboard and bent some paperclips to form legs.


This is the end of the pictures documenting the salt dough sculpture because this is where things began to get frustrating. My plans were not working - the dough is very heavy and the paperclips could not support the weight of the body. Sigh. The head was also very heavy and dug the skewer deeper and deeper into the body until it fell apart. I kept going with my little bird and here is how he turned out. Not what was envisioned in my mind.

diy salt dough bird

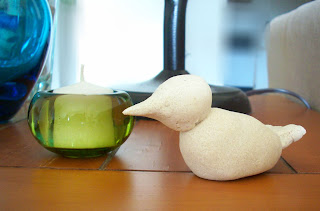
Immediately after shoving this one in the oven, I took a glob of leftover dough and started rolling it around. Please don't ask what I did next because when I came up for air, I was holding this sucker in my hand. Now, this is what I call success.

diy salt dough bird figure


Oh, and speaking of oven, you should bake your salt dough creations on the lowest oven setting for 2-4 hours.  My birds stayed in for 2 hours but had some wet spots still...which dried naturally overnight.

After my mixed salt dough results, I proceeded to get my hands dirty with some paper mache.  I made a form out of crumpled newspaper in much the same way I tried my first salt dough bird...one larger egg shape with a smaller one for the head.  I knew I wanted a cartoonish-figure to contrast against the more classic success bird above.

paper mache

I took masking tape and wrapped it around to secure the newspaper into the shape I desired and then also attached the head.

diy paper mache bird

I wasn't ready to give up on my desire to have a bird with legs so I cut a slit into the bottom of the body and slid the paperclip legs up in there. Then I took some small pieces of tape and taped between the legs to secure it in place.

bird paper mache tutorial

The key was to keep bending the legs and toes to get the body perfectly balanced over the feet. I also cut out a beak and taped it on.

Isn't he cute?
Then, I tore up pieces of kraft paper (you can use newspaper but I wanted to use up some kraft paper), soaked them in paper mache goop and slathered them all over the bird.


It is important to note that if you want a paper mache sculpture to last, you should only slather one or two layers of paper at a time and allow to dry between layers. This, along with the salt, minimizes risk of mold.  I simply placed him on a plate with the salt dough birds on the warming setting of my oven.

diy bird figurines
So warm and toasty!

After the paper mache bird is dry, I used fine grit sandpaper to lightly sand . He was then ready for another layer of goop. It is a long process, but I wanted my bird to stand the test of time, so I made sure it was completely dry between layers. I ended up doing four layers of paper and sanded in between each of them. This helped the paper to lay flat and minimized the roughness.

Good thing I had sandpaper - he is looking rough


I ended up adding a tail at the last minute by layering several pieces of paper and then "glooping" it on.  Of course, if you add a significant amount of weight to the body, you will need to tinker with the feet and rebalance the bird.


diy bird paper mache


 I think that I enjoyed making the paper mache birds more than the salt dough.  I felt I was able to create different types of birds and personalities and had more control over the end product.

Now, I just need to figure out where to place my flock of birds.


I'm linking to:
Today's Creative Blog
Someday Crafts
Blue Cricket Design
Domestically Speaking
Paisley Passions
Katie's Nesting Spot
A Glimpse Inside
Somewhat Simple

Tuesday, March 8, 2011

Balcony Gardens

It's that time again - time to start planning your vegetable gardens! John and I have been brainstorming what type of plants we'd like to grow this year. After doing some research, it seems as though many vegetables grow just as well in pots as in the ground which is good news for us apartment dwellers!

Our sunny balcony

Last year we grew lots of herbs - thyme, oregano, basil, rosemary - and lettuce in pots lined up along our windows. We didn't have a balcony in our last apartment so our garden was an experimental one.  We learned that oregano and thyme grow well in a window but basil and rosemary do not. We also learned that lettuce is a very easy plant to grow in an apartment, but don't let it bake in the sun in the middle of summer.

Last year's herb garden

With our successes and learned lessons we hit up the garden shop last weekend.  We walked away with seeds to grow bell peppers, cayenne peppers, carrots, lettuce, spinach, oregano, thyme, and marigolds.

I've been perusing garden websites to get an idea of how I'd like our balcony garden to look. My number one goal (after producing edible vegetables of course) is to ensure we don't create a jungle where there is no room for us to enjoy the balcony and sit outside.

spotted at Home Grown
I want it to be welcoming with a variety of pots and containers and plenty of space for our table and chairs

spotted at Garden Tranquility


spotted at Blue Lotus

I'd love to get a couple planters to hang - it adds differing heights and frees up room.

spotted at Free Gardening Advice


I've been saving toilet paper rolls to use as seedling pots and will probably plant those in the upcoming week or so.  For now we have to work on using up the firewood that we still have....here's hoping for a few more cold nights so we can get as much use of our fireplace as possible.

Have you tried growing vegetables in pots before? What's your favorite plant to include in your summer garden? This novice gardener would appreciate any advice from wise gardeners out there.

Monday, March 7, 2011

Versatile Blogger Award
Last week I was nominated for the Versatile Blogger award by Radn at
http://houseonashwelllane.blogspot.com.  Thank you for checking out 
my brand new blog and inviting me into the blog community!  Be sure 
to check out her blog for some great DIY inspiration!


RULES OF THE AWARD
1. Thank the person who awarded you and link back to them in your post
2. Tell 7 random facts about yourself
3. Pass the award on to 5 new found bloggers
4. Contact each blogger you want to pass the award on to and let them know you’ve done so, and let the giver of your award know you accept it.


SEVEN RANDOM FACTS ABOUT ME:1. My blog is merely a month old.  I'm enjoying meeting bloggers and joining the fellowship of this community - but boy is it hard to think of projects to write about!
2. We just moved to North Carolina for my husband's career, and I am currently looking for a job...to pass the time and keep myself occupied I've taken to finding budget-friendly ways to make our home beautiful.
3. When we need to write a note to one another, my husband and I leave them in haiku form.
4. I am a very neat and tidy person except when I'm stressed.  
5. Camping and hiking are my favorite ways to spend the summer weekends.
6. I am known as the plant rescuer. Whenever someone is giving up on a houseplant and about to toss it, I adopt it and nurse it back to health.  My theory is there is no such thing as too many plants...my husband thinks I've exceeded the limit.
7. Layla is our dog and at the ripe age of 8, she is still learning new tricks. Newest this month is "crawl".


 FIVE BLOGS I ENJOY AND AM PASSING THIS AWARD ON TO:
http://scrappingwithbuffie.blogspot.com


http://kraftykat76.blogspot.com/


http://viv-spot.blogspot.com/


http://northwoodsloves.blogspot.com/


http://blissbloomblog.blogspot.com/

Grown Up Etch-a-Sketch

This weekend was a big crafting weekend and I wish I could share my completed projects with you.  Unfortunately they were mostly birthday gifts and, given how the soon-to-be receivers may read this post, I can't ruin the surprise.  I can show you my new and improved coin jar, though!


During the Christmas season I became a bit addicted to etching glass. I etched glass ornaments, vases, hurricane glasses, tea lights - basically, if it was glass and looking a little plain I etched it.  I've tried lots of tricks, materials, and stencils and I'll show you my tried and true method.  There are a lot of etching supplies you can buy at the craft store. There's sand etching, cream etching, stencils, vinyl....oh so much! Really, all I use, though, is some etching cream, paint brush, and masking tape.  Wait, are you surprised? Remember, my motto for crafts and decorating is to create for less than it would cost to purchase.


There are a lot of very cool stencils that you can purchase, but I tend to like drawing my own art (of course, if you're trying to etch words, it would be easier to by a stencil - I speak from experience!).  Don't mind my little doodles above, I always end up trying out different drawings before I settle on the perfect one.


In order to make a "stencil", I make a layer of masking tape to take the place of vinyl. A word of caution - use at least 2 layers of masking tape right on top of each other so that the "homemade vinyl" holds up the to etching cream.  Notice that I made it larger than my drawing so that I can tape my drawing on top of the tape and cut out my stencil.


Here it is taped in place over the masking tape. I have tried many different instruments to cut out the stencil: knife, box cutter, exacto knife...but the thing that I think would best is a teeny pair of scissors.


I very carefully cut out the drawing.  Masking tape works well because it's not too sticky so it's easier to handle than you would think.


I made sure to clean the jar very well so the cream would go on evenly.


Just place the tape onto the glass item and you're ready to start etching! You can also tape down the bird itself and etch the negative space around it to leave a clear bird.  A hint if you're doing that is to cut out a circle to place around the bird so that you have a stencil while painting on the cream.


At this point follow the directions on the jar of etching cream. I used Armour Etch which calls for a thick layer to sit for five minutes. A thick layer is key to ensure your area is uniform.  I like to flip my item over and make sure I can't see any light through the cream - sometimes I find a pin-sized spot that I missed.  I also tend to leave it on for 10 minutes because I like more contrast.


After you wash it off, voila!


Now we just have to wait for a rainy day to use our rainy day fund!

I'm linking to:

Friday, March 4, 2011

Inviting Spring Inside

We've only lived in North Carolina for a few months and I'm still getting used to the area, culture, and climate. I must say, though, I am pleased that spring seems to have landed in North Carolina earlier than I've ever experienced. Every bud, leaf, and blossom I spot on walks brings a smile to my face and I become giddy at the idea of the end of winter.

I'm eagerly trying to decorate the inside of my house to reflect the sunshine and happiness that I am finding outside.

spotted in Southern Living
I have become obsessed with the blooming branches and large glass jugs I am spotting in magazines and online recently. I took a look at the branches at Michael's and unfortunately they were out of my price range...as are these to-die-for beautiful glass jugs.  Living in an apartment doesn't give one the opportunity to pick from their own backyard....and my husband has told me I'm not allowed to steal from the side of the road. I'll let you know what I figure out.


I'm also loving the idea of blown eggs in a big bowl.  I'm not sure how much they'd hold up to being packed away 8 months out of the year...or how I'd get my hands on some robin eggs.  .I'm working on a solution for this as well.

For years I've been wanting to build a cute little terrarium...perhaps now is the time. Check this cute terrarium out from Kim Vallee.  I can just picture three or four grouped together in front of a window...sigh.


Last, but not least, in my spring wish list are beautiful spring throw pillows. Bringing in some fresh colors and flowers that won't die would definitely freshen up my living room.

spotted on Home Decor Accessories Blog
What are some things you do to welcome spring?

Thursday, March 3, 2011

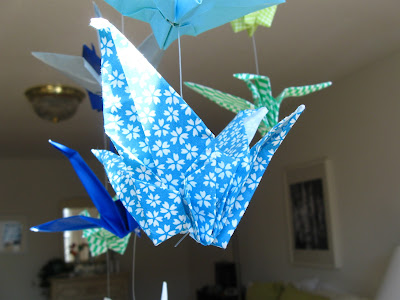
Thousand Paper Crane Mobile

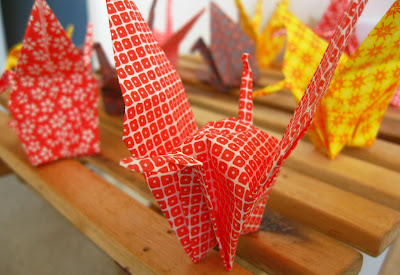
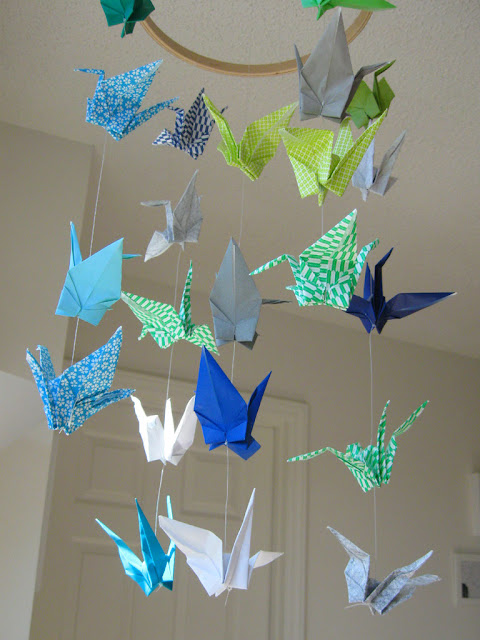
paper crane mobile


Traditionally, a thousand paper cranes are given as a wedding gift to wish a thousand years of happiness and prosperity for the couple (Wikipedia).  For my bridal shower, my wonderful bridesmaid, Julianna, made paper cranes and used them to decorate...it was beautiful.  Afterward, I couldn't fathom throwing away the beautiful cranes that she had spent so much time working on so I came up with a way to keep them and display them.

diy crane mobile

I wanted to bring some interest into the bedroom but didn't want to invest in a chandelier or anything since we're just renting. The mobile worked perfectly and became the focal point of this little nook we have.

diy paper crane mobile origami

Our bedroom's color scheme is gray, white, and green so I picked through the paper cranes and found those that would compliment our colors.

diy paper crane mobile origami

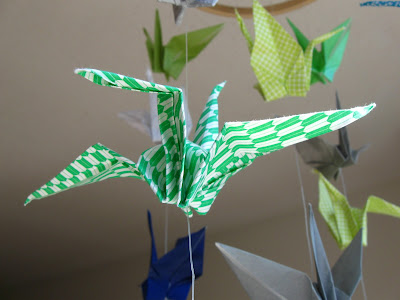
 Stealing Taking John's fishing line, I cut five differing lengths of string. I poked small holes in the top of the crane's body and thread the line through the hole on the top and out the natural hole on the bottom. I knotted the line several times and then dabbed some hot glue on it in order to keep the crane where I wanted it. Making sure to stagger each crane, I thread them on each string. 

diy paper crane mobile origami

Next, I strung two pieces of sting across an embroidery hoop to create an X and secured. This allowed me to hang a strand of cranes from the center of the mobile to fill it out a bit.  Then, I tied the other four strands of cranes around the embroidery hoop, staggering their lengths and voila!

diy paper crane mobile origami

I love that I was able to make a mobile using meaningful trinkets that remind me of my wonderful friend each time I look at it. It's also beautiful when we open the windows and a breeze comes in.

I'm linking to

Wednesday, March 2, 2011

Let Me Slipcover into Something a Little More Comfortable

If you've looked at pictures towards the beginning of this blog, you'll have noticed that our living room was bare. John and I have been living with the teeniest love seat as our only form of living room furniture for almost two years. Two years of insisting guests sit on our love seat while we make them uncomfortable by sitting on the floor, two years of uncomfortable attempting to cuddle and watch a movie (it was impossible, believe me), and two years of dreaming of a couch that we could stretch out on. Let's see if I can't remind you of our living room before...


Luckily, it was my birthday recently and I received a birthday check in the mail. The first thing I did upon opening the card was search craigslist for a couch.  It must have been my lucky day because I stumbled upon the perfect couch within my price range with nice bones and in excellent shape.  The only thing was that the upholstery was...not my style.  "No biggie," I thought, "I'll just get a cheap slipcover."

Slipcovers are expensive, my friends! The cheapest I could find at Target and Ikea were still more than I paid for the couch...and not only would my birthday money not cover that expense, I couldn't fathom spending more on what would cover the couch than I spent on the couch itself. So, I began thinking...and thinking...and thinking.

Then, I remembered that in college, my roommates and I had used a sheet to cover the hideous apartment furniture. It looked horrible and trashy, but it worked to cover the stained cushions and wooden frames.

spotted on flicker
Not really want I wanted, but it fit in our budget. I picked up two queen size flat sheets from Target for $12 each and brought them home to play with them and see what I could do.


What I was able to do resulted in the above. I simply draped one sheet across but it only covered 3/4 of the couch so I draped the other sheet on the other side and overlapped them. I then tucked the sheets into all the crevices and gingerly sat down. Of course, my husband promptly came over and plopped himself down which untucked some of the sheets. Over the course of the week, I found myself re-tucking the sheets every time I walked by the couch...it was driving me crazy. The sheets were too loose and nothing was keeping them tucked in.  I decided that I needed to create a more sturdy slipcover that withstood a dog, a husband, and a perfectionist wife.


I took off the cushions and stared for a long time...then set to work. First I thought I'd use one sheet to cover the base of the couch and one sheet to cover the cushions. As you can see in the above picture, the first idea didn't work.  Taking a different perspective, I decided to see just how much of the couch I could cover with one sheet. As you can see, it covered the majority of the couch leaving the arms and sides uncovered.

I laid out the second sheet to see how much of it I would need to cover my cushions.  Ideally I wanted to be able to wrap them completely with the sheet and sew a cover over the three of them...but after measuring, I didn't have enough sheet to do that and also cover the arms and sides of the couch.

I know I could have gone out and bought another sheet and my problems would be solved....but where's the challenge in that? So, I measured how much I needed to cover each arm all the way down the side to the floor and cut that out. 

The sheet that was left was a mere 2 inches shy of wrapping completely around the cushions. I decided that it would work if I safety pinned the sheets to the bottom of the cushions to keep my plopping husband from untucking them each time he...well....plopped.

Then came my secret weapon to keep this bad boy tucked: upholstery pins.  I stuck those suckers into the back of the couch along a seam so that the sheet would stay in one place....I stuck them into the seat of the couch before putting the cushions on to keep the sheet from slipping around...I stuck them everywhere.  That sheet is not moving.  Here is the back of the couch where I stuck some pins to keep the sheet from riding up and showing the bottom of the couch.


 Let me present to you the new and improved couch.  It is perfectly smooth, perfectly taut, perfectly tucked, and perfectly pinned to ensure that it will stay this way forever and ever. 


 We've been lounging and plopping on the couch for a week and it still looks taut, tight, and tucked.  I am happy to announce I have not re-tucked the sheets back into a crevice.

 The best part, aside from being able to walk by the couch and smile instead of tuck, is how much more we love our living room. We had guests over last weekend and everyone had a place to sit (hi Marty)! 

Thank you Nana and Pops for a wonderful birthday present!

LinkWithin

Related Posts Plugin for WordPress, Blogger...