Showing posts with label budget craft. Show all posts

Tuesday, December 6, 2011

Christmas Cards

As a child, I loved staring at our card display every year and reading the various letters people wrote updating us on their year. Never did I ever expect to be "grown-up" enough to send cards of my own. That was something families and old people did.


Well, last year John and I sent out our very first round of Christmas cards. It was fun to go through a list of people we loved, some we spoke to regularly, some we hadn't spoken to since our wedding. It was a way to tell them we are thinking of you. I greatly appreciate the cards I get from friends and family and I know they do, too.


This year, to further embrace our snowflake Christmas theme, I made homemade cards.  With my newly developed awesome snowflake making skills (seriously, after cutting hundreds for our non-tree Christmas tree and other various decorations, I'm a pro.) I whipped out some teeny snowflakes.  They were adorable and looked simple yet festive glued onto colorful cardstock.

Thursday, December 1, 2011

A Snowflake Blizzard

Note: This is the second post in a series of the unveiling of our first ever Christmas Non-Tree.
To see the first post, go here.

I love snowflakes. Real snowflakes, paper snowflakes, glass snowflakes. They are a great way for me to enjoy the snow and winter wonder while staying warm and dry. It's also a great way to bring the winter wonderland into your home.


When I began formulating my plan for our very first Christmas Non-Tree, I knew I wanted to incorporate snowflakes. If I was going to throw tradition (ours and practically everyone's) to the wind, I wanted to embrace the non-tree idea and make it completely different from any of our previous trees. Enter snowflakes. They were my life for the past week. Every spare moment was spent cutting tiny geometric shapes out of folded paper. At one point my thumb was swollen and purple from the scissors and my finger tips bruised from folding. Still, though, I persevered.


Naive me thought about 75-100 snowflakes would be enough. Nope. I ended up cutting 193 snowflakes (yes, I counted).  I think I may be a snowflake aficionado now.


If you've ever wanted to know how to fold a snowflake, here you go!

1. Start with a square:

2. Fold in half diagonally:

3. Fold in half diagonally again:

4. You will have a smaller triangle:

5. Take one side of the triangle and bring in to the middle:

6. Bring the other side over so that the outer length lines up wiith the opposite outer length: *
*hint: sometimes you have to play around with steps 5 and 6 to get them to meet perfectly.

7. Cut the top and a bit of the point:

8. Cut random shapes out of one or both sides. Play around and experiment!

9. Unfold and check out your unique paper snowflake:

Stay tuned to see how I used these snowflakes to make our very first Christmas Non-Tree!
Part one - What is a Christmas Non-Tree?

Tuesday, November 8, 2011

Glitterize This

Glitter has a natural ability to make anyone smile. Glitter chases the blues away. Glitter is happiness. For the past few months I've been drawn to glitter like a raccoon to a shiny coin and like a moth to a porch light. Everywhere I glance I see shiny happiness and I crave it for myself.

I spent much of this weekend glitterizing secret things. The problem with making Christmas presents for family and friends is that I can't show them off here! Instead I will show off some glittery projects I've been appreciating from afar.

via

I am in love with this packaging idea! Since I don't have glitterized (oh, and yes, as of this morning glitterize is a verb) ribbon I bet I could accomplish the same thing with double sided tape dipped in glitter on one side.

via

This project has been blowing up my pinterest homepage for the past week or so - just an easy, genius, glitterized project!! I'm picturing silver and gold and blue...

via

Oh Martha. Beautiful! Actually, these remind me of some candles I bought from Target about three seasons ago that were beautiful and glitterized. It would be a lot cheaper to make them myself!

via

Glitterized pumpkins aren't just for Halloween, folks. Thanksgiving is begging for some bling this year!

via

Oh, excuse me, I'm sorry, I just swooned. This photo makes me fall in love with glitter over and over and over again.  Thanksgiving is going to be so blinged out!

via

When I have a little girl, her room will have many glitterized lanterns hanging from the ceiling. Every little girl needs glitter in her life.

via

I have yet to experience this awesomeness-in-a can first-hand, but from what I've read online, people can't praise it enough. Perhaps this weekend Glitter Blast and I will have a fun date.

I've learned that, while glitter is the herpes of craft supplies, it also just might be the heroin of craft projects. Once you glitterize one thing you're trapped and you'll find yourself wanting to glitterize your dog, your car, and your couch. What are some things you've been glitterizing?What color glitter do you think would make Layla like her collar of shame a little more?

Thursday, November 3, 2011

Free DIY Wooden Frames

Growing up in Albuquerque, New Mexico, I am mildly obsessed with the Sandia Mountains. These majestic mountains can be seen from literally every spot in the city. Just look east and there they are. After moving to the east coast ten years ago, I still find myself scanning the horizon for my mountains much like a toddler blindly reaches for her blanket in moments of stress.


When I went to college in Virginia, I tried to placate myself with photos of the mountains pasted on every inch of my cinder block dorm room. The above photo is actually a card that followed me to every dorm room and apartment until I graduated. For the past six years it's been in a box of mementos hidden from view because I now require my art framed instead of merely taped to the wall.

After finishing my take on the recent pallet art phenomenon (check it out here), I began brainstorming other ways of using paint stir sticks. With the help of my trusty miter saw I knew I could easily make a picture frame.


After few 45 degree angle cuts I had the beginnings of a frame.  I took the scraps of some stir sticks and used them to secure the sticks together at the angles with gorilla glue.


Voila!  A simple frame was created...for free!  Add some paint, glue on a sawtooth hanger, and throw in a picture - you've got yourself a piece of art worthy of more than a dorm room wall.


Now when I find myself homesick and needing some comfort, I can glance over at my mountains and feel a bit calmer.

Tuesday, November 1, 2011

Wood Plus Stain Equals Art Tutorial

I feel as though I could start every single post with the sentence, "I was looking at Pinterest recently and...."  I spend entirely too much time on that amazing site (by the way, check out my boards on pinterest) but I love being awed and wowed and inspired by the amazing things I see there. All summer I kept noticing fabulous art created by pallets people were finding. After staining them and painting quotes or silhouettes, those free pieces of wood became beautiful.

I was torn by these beauties. You see, I desperately wanted to make some art with wooden planks but, as a former manager of a store that used thousands of pallets a week, I saw what most planks are coated with, how unsanitary they are treated, and how disgusting many of them are. I did not want to bring disease-invested wood into our home so I decided to find another way to create some free wooden plank art.


Enter paint stir sticks. I had a handful of these awesome, crafty sticks leftover from a previous project and pulled them out of the closet. They were perfect for what I had in mind!


After cutting off the beveled edges and picking out the most interesting sticks, I was left with the perfect little square of wood.  Taking some leftover stain from our branch bench (check it out here), I stained each stick. I wanted to stain them separately rather than all together once they were attached to one another in order to get a varied and non-uniform stain. My goal was to make this look as rustic and plank-like as possible.


The stain went on beautifully - check out the personality that little paint stir sticks can have.


Once they were dry, I used gorilla glue to glue the scraps I had sawed off earlier. 


Waiting 2 hours for the glue to dry was torture but I used the time to decide what I wanted to paint on my lovely canvas.


Now I have my very own faux pallet art!  Oh, and while working with the paint stir sticks, I started a couple more projects...stay tuned to see what else I can make out of these free pieces of wood!


DIY Club

Monday, October 31, 2011

Autumn Branch

If you've read any of my previous projects you know that I love incorporating sticks nature into our decor.  We've made benches and plant stands, art, pom pom flowers, and even a jewelry holder out of sticks. The most unique stick project we've done, however, has been the focal point of our living room. Above our television we have a huge branch.  We've decorated it with spring-like leaves, summery flowers, and now it's covered in fall leaves.


My personal favorite is the brown, glittery leaf. It adds just the right amount of sparkle to keep the branch's fall leaves from seeming too sad and death-like.


I am already planning on our Christmas-themed decorations...I'm thinking a colorful garland and perhaps some lights....


But for now, we have welcomed the colorful autumn season into our home.

Friday, October 21, 2011

Sweater Pillow Tutorial

After showing the first sweater pillow I created, I got several emails asking for a tutorial.  Not that I needed a reason to make a second pillow...these pillows are soft and cuddly and perfect for the cooling weather.

goodwill sweater pillow tutorial diy

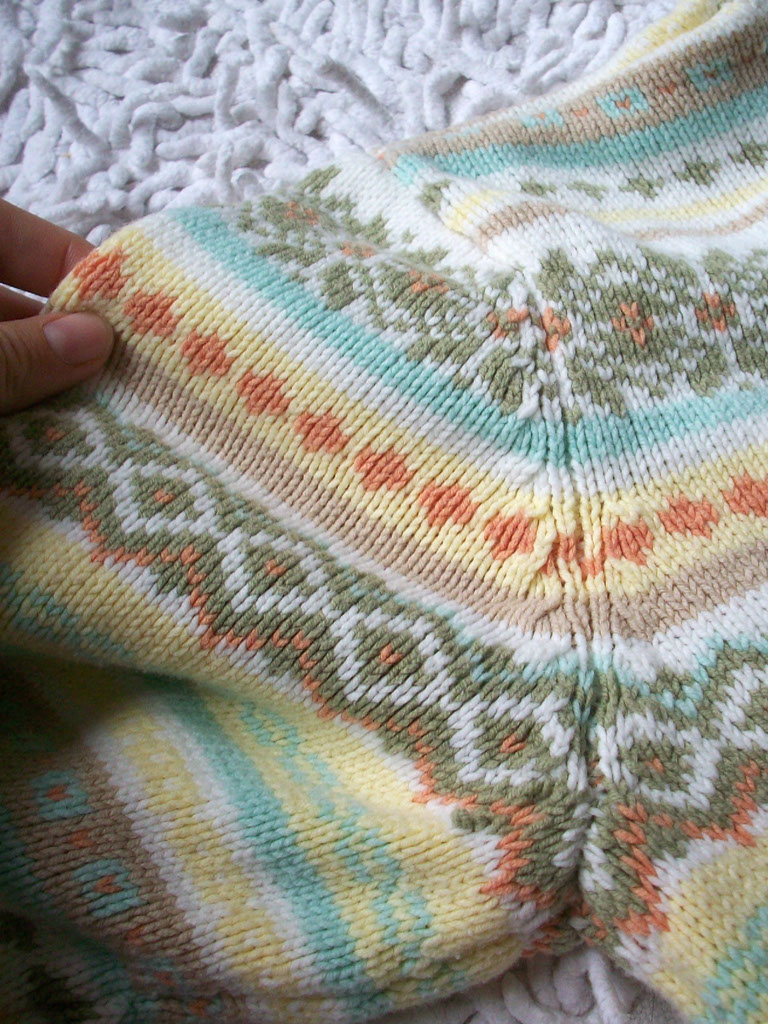
Allow me to introduce you to my Goodwill sweater. This colorful guy was tired of seeing the back of closets - with his busy patterns and unique color scheme he had little hope of making it out of that closet. Until I found him.  I recognized the greens and blues and yellows and creams that are right at home in my living room color scheme. Better yet I recognized the tans and oranges as a hint of fall that I've been looking for.  So that, my friends, is how this sweater made it home with me.

sweater upcycle pillow diy

As with all fabric I bring home from Goodwill, I washed him in hot water.  Washing and drying the sweater allows for some felting to occur. I prefer the slightly felted look - it ensures the sweater is close-knit and won't gape and show the stuffing or pillow insert. It also gives me peace of mind that the yarn won't unravel. 

sweater pillow tutorial diy

After he was dry (I put him in the dryer for a little bit and then allowed him to finish air drying), I took off the arms. I did this because the size of my pillow was going to force me to go slightly above the body of the sweater and past the arm area.

sweater upcycle pillow diy

The arms are sewed on with a long piece of yarn. It's easy to determine which yarn once you squint put on your glasses and get a good look. Using a seam ripper, I worked my way around both arm openings.

pillow upcycle knit sweater diy

Don't worry if you lose track of which yarn is the yarn you are ripping. I just skipped that section and started up again when I found a spot that was obvious.  Once you are ready to go back and work on the skipped section, it's easy to rediscover the yarn used to sew both pieces together.  You can see how I skipped a small section in the photo below.

goodwill sweater pillow upcycle diy

With the arms off, you're left with a lovely sweater vest that you may just decide to keep as it. Kidding!  But ripping out the seams, you ensure that the yarns are not going to ravel because you are keeping the knitting and its hems intact at this point.

sweater pillow tutorial diy

Now it's time to determine the size of your pillow. I wanted a 15x15 pillow which unfortunately meant that I would have to cut off some of the sides and go up into the arm area. If your sweater is larger than mine, you could just close up the bottom and the top of the sweater and call it a day!

sweater pillow tutorial diy

I used a couple pins to keep the sweater together and mark the path I was sewing along. I then changed my stitch length to the smallest length possible. I did this to ensure that I caught every single piece of yarn so that unraveling wouldn't be a problem.

sweater pillow upcycle diy

If you look very closely at the photo below, you'll see the white stitching running horizontally across the sweater. I chose to put in two lengths of stitches running parallel to each other to provide extra protection against unraveling.  Once that is done, cut your sweater.

diy cable knit pillow tutorial

Once you've completed your pillow, fluff and enjoy!

diy knit pillow tutorial

You can see my pillow needs some much needed cuddling to get the stuffing in all the right places.

diy knit pillow tutorial

My living room is slowly becoming ready for the colder months. I just need to incorporate some darker, more saturated colors (I'm thinking a hunter green and/or navy blue to darken up the color pallet) and a knitted throw.

diy knit sweater pillow tutorial

Last night this little guy was my go-to-pillow while watching television. He makes a much  better pillow than sweater, don't you think?

knit sweater pillow upcycle diy

Pin It

LinkWithin

Related Posts Plugin for WordPress, Blogger...