Showing posts with label decorate. Show all posts

Monday, October 31, 2011

Autumn Branch

If you've read any of my previous projects you know that I love incorporating sticks nature into our decor.  We've made benches and plant stands, art, pom pom flowers, and even a jewelry holder out of sticks. The most unique stick project we've done, however, has been the focal point of our living room. Above our television we have a huge branch.  We've decorated it with spring-like leaves, summery flowers, and now it's covered in fall leaves.


My personal favorite is the brown, glittery leaf. It adds just the right amount of sparkle to keep the branch's fall leaves from seeming too sad and death-like.


I am already planning on our Christmas-themed decorations...I'm thinking a colorful garland and perhaps some lights....


But for now, we have welcomed the colorful autumn season into our home.

Thursday, October 27, 2011

Small Bedroom Lessons

via

I found myself loving this photo that I found of a bedroom and didn't realize immediately how small the room actually was.  That, my friends, is how you know you've decorated a small room well.  Despite the size of the bedroom, the scale of the painting doesn't overwhelm; instead it detracts from it and becomes the wonderfully colorful and playful focal point. Lesson learned - don't be afraid of size and colors when dealing with a teeny room.

via Pinterest

After seeing the fabulous yellow room, I became inspired to check out some other marvelous small rooms.  The bed barely fits in this room, but it feels so comfortable and homey that size doesn't matter.  The layers of blankets, the mirror headboard, and the pillows galore help to keep your eye traveling around and noticing the many patterns and colors.  Lesson learned: use patterns to keep the eye busy and create a comfortable sanctuary with layers of blankets and pillows.

via

I'm sure I'm not alone when I share that I was always under the impression that dark colors make a room seem smaller. So, why would one decorate a teeny room in dark colors? It seems the photo of this lush purple room shows that dark colors create cocoons of  luxury.  The deep colors, the gold lampshades, the various fabrics on the bed make you feel like royalty.  Lesson learned: when dealing with a small room, create a cocoon.

via Pinterest

Here we have another large focal point in a teeny tiny room. This room is different from the first, in that the room is bathed in neutral colors and accessories...all but the lively goldfish on the wall. Lesson learned: Punch up a small, neutral room with a quirky piece of art.

via Pinterest

This room just feels like a sanctuary to me. From the lighting to the headboard to the enveloping use of colors, I feel like I could spend all day in this small room and not feel boxed in.  I can't decide on my favorite feature of this room - the fun curtains, the fabulous chandelier, the plush headboard, or the painted ceiling.  Luckily these many features work together rather than compete against one another and you're left with a room you can't get enough of. Lesson learned: just because it's a small space, don't be afraid to accessorize with glamorous chandeliers and beds.

via

This is the definition of teeny tiny room.  Despite the physical limitations, this room features a bed, storage, and awesome accessories.  With a feature wall of wood from an old gym floor, they decided to keep everything else light and airy. Color was added to increase interest and I love the mini gallery wall. Lesson learned: Accessories, when done right, don't cramp or clutter a small bedroom but create a legitimate bedroom.

via

Here is another example of accessorizing a small bedroom without cramping or cluttering the small space. A mirror is useful in using optical illusion to create more space. The gallery wall is a wonderful focal point, but notice that even the photos take on a neutral tone to match the subtle gray walls and airy, light curtains. Lesson learned: Maintain a neutral color palette when using many accessories to help combat a cluttery feel.

Wednesday, June 15, 2011

Bringing the Outdoors Indoors

I'm sure by now you know just how much I love nature and how much I love to invite it into my home. Not only have I used one branch as art, I used another branch as a jewelry hanger and yet another fallen tree to make a bench.  Yes, I love nature and trees and flowers.

I was perusing the large and infinite world wide web recently and discovered that there are others that are beginning to bring the outdoors in.  Branches, leaves, and driftwood all provide a neutral, yet majestic touch when used in decorating.

via

I have fallen in love with this twig lantern. It's simplicity and rustic charm are coupled with the elegance of the smooth, bare wood.

via

This lamp would be so simple to recreate with a small cylinder lamp base, some straight sticks, and twine to hold them together.  It would match any color combination and bring a dash of interest to a corner.

via re-nest

This very creative pendant lighting is beautiful and completely unexpected. If you look closely, you'll see the branch being supported in the pot with the pendant lamp cords wrapped tightly around the length of the branch.  I can also picture a branch hanging from the ceiling and supporting lighting above a dining room table.

via diy ideas

I have this picture saved on my computer and every now and then open it just to stare at it. Such a great idea to use a branch as a unique upcycled curtain rod.

via a la mode

Sunburst mirrors have been making a big splash in the blogging community and here is one that I love.  They spent hours on the beach collecting perfectly straight driftwood pieces and their result is beautiful.

I've been inspired to continue bringing the outdoors in in small but unique ways. Perhaps a trip to Goodwill is in order to find a lamp just begging to be wrapped in sticks.

Tuesday, June 7, 2011

How Does Your Garden Grow?

Summer is my absolute favorite time of the year. Bring on the heat, the sun, the longer days, and the festivals and fun!  One of my favorite things about our apartment is the awesome balcony we have created. It's our first balcony and boy are we making use of it! 


We bought the side table and chairs the moment we signed our lease because we were that excited for our balcony! We eat dinner out here most evenings and love watching the neighborhood kids practice their skateboarding tricks every afternoon.


It's also a great retreat from our warm apartment (we haven't turned on our air conditioner yet) once the temperatures cool at night and the perfect spot to watch summer thunderstorms.


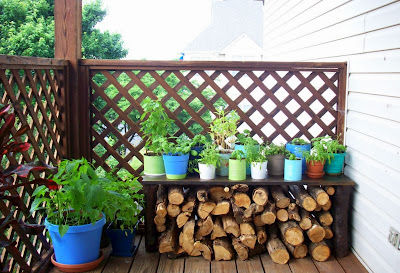
Our vegetables are growing like crazy and the cayenne peppers have little white flowers.  John keeps checking the carrots sure that they are ready to eat but they still have about a month left of incubation.  On the left are our bell peppers that I can hardly wait for.


As you can see, I got a little zealous with my basil seed planting and now our basil has taken over our entire garden....we have 25 individual basil plants. If anyone has any delicious basil recipes, please share. We've been eating lots of basil and mushroom pizza and will be making some pesto in the next week or so.


There are also some flowers dispersed here and there - marigolds and alyssum.  They haven't started blooming yet but I can't wait until there is some color mixed in with the sea of green.


Don't forget to pass along those basil recipes! I'm off to enjoy the sunrise while sipping on my coffee out on the balcony.

Wednesday, April 13, 2011

Five Minute Improvement

I love quick fixes, especially quick fixes that fix a problem that's been plaguing for years.

I've had a stack of these coasters that were given to me for my birthday about five years ago...maybe longer. They were fun in college and grad school when we had many wine-filled gatherings but they stick out like a sore thumb now.  I hated the thought of buying new coasters when we had a stack of great ones but it was time for something new. Enter the five minute improvement.

I had some scraps of paper from my decoupaged pot and decided to finally do something about our coasters.

Before


I traced the coasters onto the paper, glued them down using mod podge and then painted an additional layer of mod podge on top.

After

Simple!

Monday, March 7, 2011

Grown Up Etch-a-Sketch

This weekend was a big crafting weekend and I wish I could share my completed projects with you.  Unfortunately they were mostly birthday gifts and, given how the soon-to-be receivers may read this post, I can't ruin the surprise.  I can show you my new and improved coin jar, though!


During the Christmas season I became a bit addicted to etching glass. I etched glass ornaments, vases, hurricane glasses, tea lights - basically, if it was glass and looking a little plain I etched it.  I've tried lots of tricks, materials, and stencils and I'll show you my tried and true method.  There are a lot of etching supplies you can buy at the craft store. There's sand etching, cream etching, stencils, vinyl....oh so much! Really, all I use, though, is some etching cream, paint brush, and masking tape.  Wait, are you surprised? Remember, my motto for crafts and decorating is to create for less than it would cost to purchase.


There are a lot of very cool stencils that you can purchase, but I tend to like drawing my own art (of course, if you're trying to etch words, it would be easier to by a stencil - I speak from experience!).  Don't mind my little doodles above, I always end up trying out different drawings before I settle on the perfect one.


In order to make a "stencil", I make a layer of masking tape to take the place of vinyl. A word of caution - use at least 2 layers of masking tape right on top of each other so that the "homemade vinyl" holds up the to etching cream.  Notice that I made it larger than my drawing so that I can tape my drawing on top of the tape and cut out my stencil.


Here it is taped in place over the masking tape. I have tried many different instruments to cut out the stencil: knife, box cutter, exacto knife...but the thing that I think would best is a teeny pair of scissors.


I very carefully cut out the drawing.  Masking tape works well because it's not too sticky so it's easier to handle than you would think.


I made sure to clean the jar very well so the cream would go on evenly.


Just place the tape onto the glass item and you're ready to start etching! You can also tape down the bird itself and etch the negative space around it to leave a clear bird.  A hint if you're doing that is to cut out a circle to place around the bird so that you have a stencil while painting on the cream.


At this point follow the directions on the jar of etching cream. I used Armour Etch which calls for a thick layer to sit for five minutes. A thick layer is key to ensure your area is uniform.  I like to flip my item over and make sure I can't see any light through the cream - sometimes I find a pin-sized spot that I missed.  I also tend to leave it on for 10 minutes because I like more contrast.


After you wash it off, voila!


Now we just have to wait for a rainy day to use our rainy day fund!

I'm linking to:

Friday, March 4, 2011

Inviting Spring Inside

We've only lived in North Carolina for a few months and I'm still getting used to the area, culture, and climate. I must say, though, I am pleased that spring seems to have landed in North Carolina earlier than I've ever experienced. Every bud, leaf, and blossom I spot on walks brings a smile to my face and I become giddy at the idea of the end of winter.

I'm eagerly trying to decorate the inside of my house to reflect the sunshine and happiness that I am finding outside.

spotted in Southern Living
I have become obsessed with the blooming branches and large glass jugs I am spotting in magazines and online recently. I took a look at the branches at Michael's and unfortunately they were out of my price range...as are these to-die-for beautiful glass jugs.  Living in an apartment doesn't give one the opportunity to pick from their own backyard....and my husband has told me I'm not allowed to steal from the side of the road. I'll let you know what I figure out.


I'm also loving the idea of blown eggs in a big bowl.  I'm not sure how much they'd hold up to being packed away 8 months out of the year...or how I'd get my hands on some robin eggs.  .I'm working on a solution for this as well.

For years I've been wanting to build a cute little terrarium...perhaps now is the time. Check this cute terrarium out from Kim Vallee.  I can just picture three or four grouped together in front of a window...sigh.


Last, but not least, in my spring wish list are beautiful spring throw pillows. Bringing in some fresh colors and flowers that won't die would definitely freshen up my living room.

spotted on Home Decor Accessories Blog
What are some things you do to welcome spring?

Monday, February 21, 2011

DIY Desk

When John and I got married, we brought together two people's worth of stuff. Two CD collections, two sets of towels, two dressers, two desks. Sometimes two is better than one, but sometimes two is just too much.  Take, for instance, our office. Yes, it was nice to have two desks with which to house our two computers, two filing cabinets, and two sets of desk accessories, not to mention two people who wanted to be at the desk at the same time. However, two desks also meant less room, double the messiness when desks were unorganized, and mega mismatched furniture.

John's desk was messy, bulky, 80's style, messy, bulky, messy...I didn't like his desk very much.


My desk was more elegant with curvy legs and cream paint - much like this desk without the top drawers or mirror. Unfortunately, it was teeny with no storage.


So, when we moved to North Carolina, we knew we wanted to streamline our office furniture and create an office with room to hang out, play music, and enjoy.  Our number one criteria in a desk was that it be large enough hat we could both sit at it on our computers at the same time.  With John going to graduate school, we knew he'd need a desk conducive to spreading out and doing homework, but I also wanted a space that was my own and separate from his messiness (see above picture of his desk to understand why).  Our second criteria was that it not cost us an arm and a leg.

Quickly after beginning our search for the perfect desk, we realized that our two criteria left us with basically no options. The desks we could afford were too small, the desks that were large enough were too expensive. We spent a lot of time looking at Ikea, but even the Besta Burs desk was more than we were willing to spend at $249.


Around the same time we were dealing with our desk dilemma, the writers at YoungHouseLove.com were also struggling with the same situation.  It seemed our criteria were identical, as was our budget. So, we stole their idea of converting a door into a desk.  Looking back at how they ended up constructing their desk, their dimensions were different and we went about constructing the desk in different ways, but the ideas were the same and the outcome pretty identical.

spotted at Young House Love

We bought a $17 plain interior door from Home Depot as well as $15 worth of pine studs to serve as legs and reinforcement. I wish we had taken pictures of our progress but alas, we did not. I will say that John did a great job ensuring our desk would be strong and stable. 

After a coat of primer and paint, this is what our desk looked like


John inserted two wooden braces under the table to reinforce the desk and make sure it could hold the weight of whatever we wanted to place on our desk.


 The rails, in addition to being pretty, serve as extra reinforcement. Believe me, this desk is ready for a weight lifting competition. 

In college I had a shelf I used for my monitor. We spray painted it white to match the desk so that we would have a place to put our printer and other things. With the lack of drawers, we've had to think about how to organize the desk and make use of every bit of space.


Our desk turned out as sturdy as John hoped and as pretty as I hoped. Not only do we have much more room in our office, the room looks more put together without the mumble and jumble of mismatched furniture. We're most proud of the price tag of this desk. Total, including wood and paint, we spent $35.


Next on my to do list is to wrangle those cords together...they drive me crazy!

Tuesday, February 15, 2011

I Don't Recycle - I Decorate....With Wine Bottles

Wine bottles. Spice jars. Olive oil bottles. Salsa jars. The most common food is often stored in the prettiest little bottles. When a bottle is empty, I gaze at it, clean it, and then use it to decorate my house.

Don't you?


Wait, are you telling me not everyone has empty wine bottles around their home?


Oh.

At one point, my collection of wine bottles was getting a little out of hand. You may wonder why I didn't recycle them or even just toss them in the trash. That, my blogging friend, is a very good question. You see, I think I may have a problem. It stems from my inability to fathom spending inordinate amounts of money on pretty vases and other decorating items when I could use what I already have. A problem arises, then, when I pour the last drop of wine...or olive oil. When I shake the last flakes of dried spices or scoop out the last of the pesto I think to myself, "Wow, that's a pretty bottle. If my husband were to ever give me flowers, I could put one in this little spice jar and put it on my bedside table." That is how my out of control collection began.

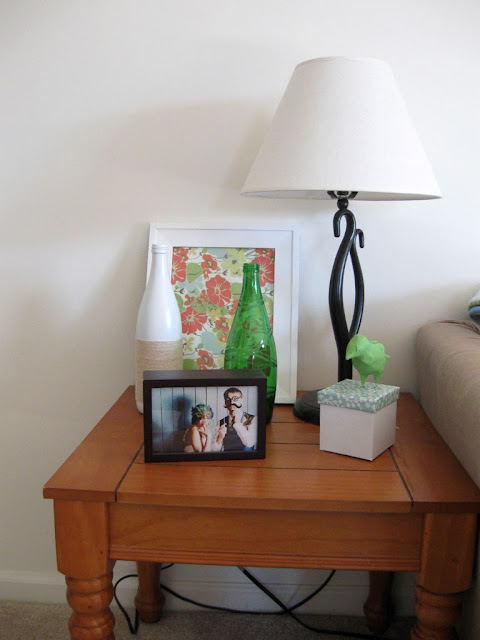
I have been trying to part with my pretty little bottles, but it's hard! So, instead, I'm attempting to re-purpose them, make them appear a little more sophisticated, a little more in tune with my decorating style. For example, in the above picture of my living room I have three wine bottles on the end tables. I like to think they work better spray painted, etched, and hot glued.

recycle wine bottles decorating

Here are some examples of my re-purposed bottles:


I'm also in the process of altering some spice jar by making faux milk glass vases...more on those later.

Is there anyone else out there who hoards glass jars and bottles or am I the only one?

LinkWithin

Related Posts Plugin for WordPress, Blogger...