Monday, October 31, 2011

Autumn Branch

If you've read any of my previous projects you know that I love incorporating sticks nature into our decor.  We've made benches and plant stands, art, pom pom flowers, and even a jewelry holder out of sticks. The most unique stick project we've done, however, has been the focal point of our living room. Above our television we have a huge branch.  We've decorated it with spring-like leaves, summery flowers, and now it's covered in fall leaves.


My personal favorite is the brown, glittery leaf. It adds just the right amount of sparkle to keep the branch's fall leaves from seeming too sad and death-like.


I am already planning on our Christmas-themed decorations...I'm thinking a colorful garland and perhaps some lights....


But for now, we have welcomed the colorful autumn season into our home.

Happy Halloween

via

Happy Halloween! I am off to accompany Layla-Butt to the vet but I will be back soon to show off the new branch decorations (take a look at the original branch and her summer decorations).

Friday, October 28, 2011

Dreary Friday


I had plans to take pictures of a few recent projects around the house with the bright morning light that streams in our windows. Instead I woke up to rain and dreariness so I chose to sip a homemade latte instead of finding my camera.  I wonder if a good latte has the power to make the rain go away...

Last night my mind was racing with creative ideas.  I only wish I had jotted them down with a sketch because I'm worried my creative juices may have leaked throughout the night.  I wonder where awesome ideas go when you lose or forget them? Someone somewhere must be hoarding them.

Thursday, October 27, 2011

Small Bedroom Lessons

via

I found myself loving this photo that I found of a bedroom and didn't realize immediately how small the room actually was.  That, my friends, is how you know you've decorated a small room well.  Despite the size of the bedroom, the scale of the painting doesn't overwhelm; instead it detracts from it and becomes the wonderfully colorful and playful focal point. Lesson learned - don't be afraid of size and colors when dealing with a teeny room.

via Pinterest

After seeing the fabulous yellow room, I became inspired to check out some other marvelous small rooms.  The bed barely fits in this room, but it feels so comfortable and homey that size doesn't matter.  The layers of blankets, the mirror headboard, and the pillows galore help to keep your eye traveling around and noticing the many patterns and colors.  Lesson learned: use patterns to keep the eye busy and create a comfortable sanctuary with layers of blankets and pillows.

via

I'm sure I'm not alone when I share that I was always under the impression that dark colors make a room seem smaller. So, why would one decorate a teeny room in dark colors? It seems the photo of this lush purple room shows that dark colors create cocoons of  luxury.  The deep colors, the gold lampshades, the various fabrics on the bed make you feel like royalty.  Lesson learned: when dealing with a small room, create a cocoon.

via Pinterest

Here we have another large focal point in a teeny tiny room. This room is different from the first, in that the room is bathed in neutral colors and accessories...all but the lively goldfish on the wall. Lesson learned: Punch up a small, neutral room with a quirky piece of art.

via Pinterest

This room just feels like a sanctuary to me. From the lighting to the headboard to the enveloping use of colors, I feel like I could spend all day in this small room and not feel boxed in.  I can't decide on my favorite feature of this room - the fun curtains, the fabulous chandelier, the plush headboard, or the painted ceiling.  Luckily these many features work together rather than compete against one another and you're left with a room you can't get enough of. Lesson learned: just because it's a small space, don't be afraid to accessorize with glamorous chandeliers and beds.

via

This is the definition of teeny tiny room.  Despite the physical limitations, this room features a bed, storage, and awesome accessories.  With a feature wall of wood from an old gym floor, they decided to keep everything else light and airy. Color was added to increase interest and I love the mini gallery wall. Lesson learned: Accessories, when done right, don't cramp or clutter a small bedroom but create a legitimate bedroom.

via

Here is another example of accessorizing a small bedroom without cramping or cluttering the small space. A mirror is useful in using optical illusion to create more space. The gallery wall is a wonderful focal point, but notice that even the photos take on a neutral tone to match the subtle gray walls and airy, light curtains. Lesson learned: Maintain a neutral color palette when using many accessories to help combat a cluttery feel.

Friday, October 21, 2011

Sweater Pillow Tutorial

After showing the first sweater pillow I created, I got several emails asking for a tutorial.  Not that I needed a reason to make a second pillow...these pillows are soft and cuddly and perfect for the cooling weather.

goodwill sweater pillow tutorial diy

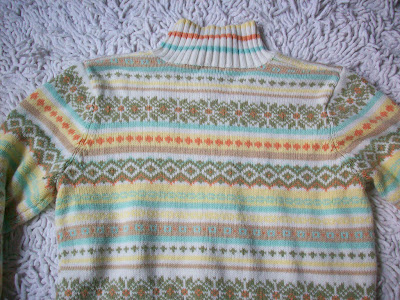
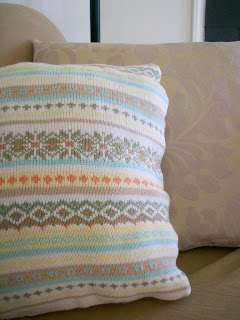
Allow me to introduce you to my Goodwill sweater. This colorful guy was tired of seeing the back of closets - with his busy patterns and unique color scheme he had little hope of making it out of that closet. Until I found him.  I recognized the greens and blues and yellows and creams that are right at home in my living room color scheme. Better yet I recognized the tans and oranges as a hint of fall that I've been looking for.  So that, my friends, is how this sweater made it home with me.

sweater upcycle pillow diy

As with all fabric I bring home from Goodwill, I washed him in hot water.  Washing and drying the sweater allows for some felting to occur. I prefer the slightly felted look - it ensures the sweater is close-knit and won't gape and show the stuffing or pillow insert. It also gives me peace of mind that the yarn won't unravel. 

sweater pillow tutorial diy

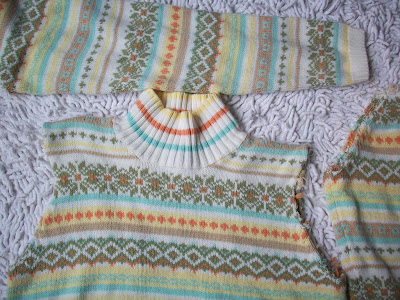
After he was dry (I put him in the dryer for a little bit and then allowed him to finish air drying), I took off the arms. I did this because the size of my pillow was going to force me to go slightly above the body of the sweater and past the arm area.

sweater upcycle pillow diy

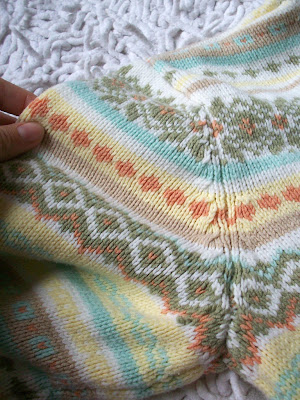
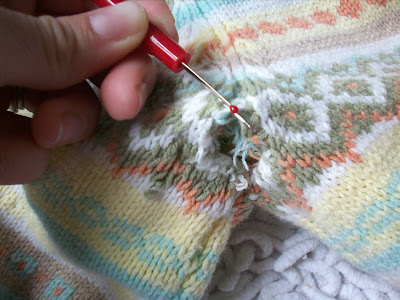
The arms are sewed on with a long piece of yarn. It's easy to determine which yarn once you squint put on your glasses and get a good look. Using a seam ripper, I worked my way around both arm openings.

pillow upcycle knit sweater diy

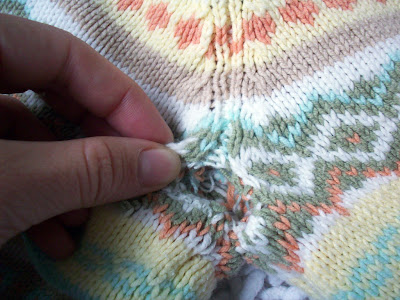
Don't worry if you lose track of which yarn is the yarn you are ripping. I just skipped that section and started up again when I found a spot that was obvious.  Once you are ready to go back and work on the skipped section, it's easy to rediscover the yarn used to sew both pieces together.  You can see how I skipped a small section in the photo below.

goodwill sweater pillow upcycle diy

With the arms off, you're left with a lovely sweater vest that you may just decide to keep as it. Kidding!  But ripping out the seams, you ensure that the yarns are not going to ravel because you are keeping the knitting and its hems intact at this point.

sweater pillow tutorial diy

Now it's time to determine the size of your pillow. I wanted a 15x15 pillow which unfortunately meant that I would have to cut off some of the sides and go up into the arm area. If your sweater is larger than mine, you could just close up the bottom and the top of the sweater and call it a day!

sweater pillow tutorial diy

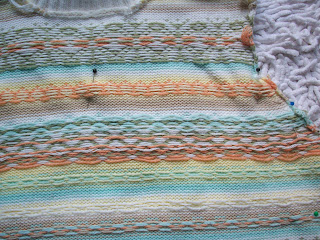
I used a couple pins to keep the sweater together and mark the path I was sewing along. I then changed my stitch length to the smallest length possible. I did this to ensure that I caught every single piece of yarn so that unraveling wouldn't be a problem.

sweater pillow upcycle diy

If you look very closely at the photo below, you'll see the white stitching running horizontally across the sweater. I chose to put in two lengths of stitches running parallel to each other to provide extra protection against unraveling.  Once that is done, cut your sweater.

diy cable knit pillow tutorial

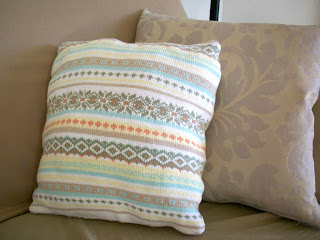
Once you've completed your pillow, fluff and enjoy!

diy knit pillow tutorial

You can see my pillow needs some much needed cuddling to get the stuffing in all the right places.

diy knit pillow tutorial

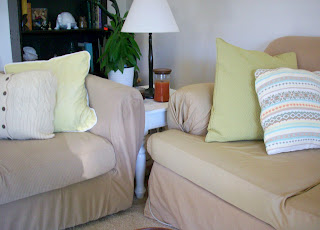
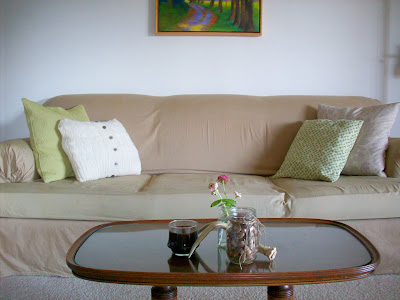
My living room is slowly becoming ready for the colder months. I just need to incorporate some darker, more saturated colors (I'm thinking a hunter green and/or navy blue to darken up the color pallet) and a knitted throw.

diy knit sweater pillow tutorial

Last night this little guy was my go-to-pillow while watching television. He makes a much  better pillow than sweater, don't you think?

knit sweater pillow upcycle diy

Pin It

Thursday, October 20, 2011

Styrofoam Upcycle #4

twine photo frame diy

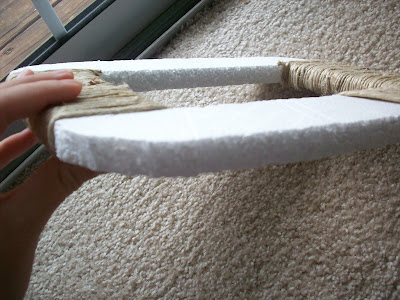
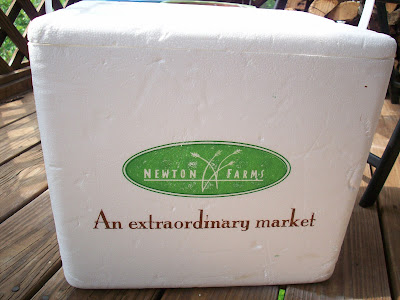
Last spring we were cleaning out our storage shed when we found a styrofoam cooler that was merely taking up space. Instead of throwing it away, I decided to upcycle as much of it as possible and proceeded to make a couple frames and a few awesome letters for my gallery wall (seen here and here).

diy frame upcycle

Well, that styrofoam cooler produced more styrofoam that I thought possible when I was dissecting it and I finally got around to upcycling another piece of the cooler.

twine wrapped frame diy

 I had cut out a variety of rectangles knowing I wanted to make some textured frames.  I have many frames displayed on our gallery wall, but aside from my twig art and cork heart, texture and natural fibers were missing (and we all know how much I love bringing natural fibers and organic matter into the mix)

wrapped picture frame diy

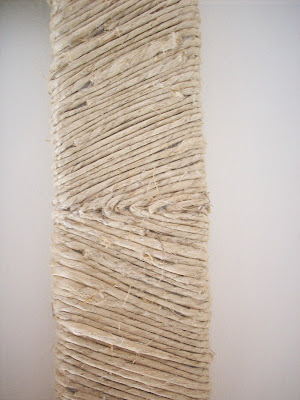
Using some hemp twine I had from a project gone bad, I began wrapping and gluing (with hot glue), wrapping and gluing, wrapping and gluing. 

twine frame diy upcycle

 I love how some of the smaller details turned out. The V pattern at the corners and centers of each long leg add additional interest.

styrofoam upcycle frame

 It feels good to create something out of what would normally be thrown in a landfill and left to blow around for hundreds of years. Instead, I have a lightweight, textured frame to add to my gallery wall.

diy frame upcycle styrofoam

I'm still deciding if I should leave it empty or add some art. What do you think?
styrofoam upcycle picture frame

Tuesday, October 18, 2011

Pinspiring Sweaters

Edit: Pssst...check out the tutorial here!

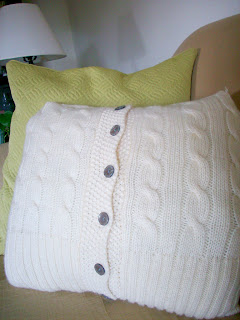
cable knit pillow

 A long long time ago I shared that I was obsessed with Pottery Barn's amazing knitted pillows and blankets. Well, after being pinspired (yes, I made up a word just for pinterest) by Brassy Apple, I decided I needed to do something other than drool all over the pillows at the mall.

knit pillow

A trip to Goodwill, some slight felting, some seam ripping action, and a little sewing later I have myself a cuddly pillow.

cable knit pillow


Wednesday, October 12, 2011

Vacation is Over

I'm back, I'm back! After a crazy non-stop road trip, some car repairs (yes, my DIY skills are moving over to cars now), and a major washing machine diy fix, I'm back!

Oh, but I guess I need things to talk to you wonderful blog people about, huh? And perhaps some pictures...a fun idea or two would make you happy, too, huh? Hmmm...

Ok, I'll be back in a little bit. I must first go find something...to...you know...show you. I'm sorry I must run off like this so soon after returning. Don't go far...I'll be back soon!

Wednesday, October 5, 2011

Home Sweet Home


There is nothing better than walking into your home after ten days away and being greeted by a dog. Layla-Butt wiggled, squealed, grunted, and was overjoyed that I was home. Best welcome ever! Now she's my little shadow following me around and laying on my feet to ensure I don't disappear again.

Cleaning the house, doing laundry, and going grocery shopping are all on my to do list over the next couple days but I hope to also begin making some Halloween decorations and getting ready for fall.

LinkWithin

Related Posts Plugin for WordPress, Blogger...