Showing posts with label paper mache. Show all posts
Showing posts with label paper mache. Show all posts
Monday, May 2, 2011
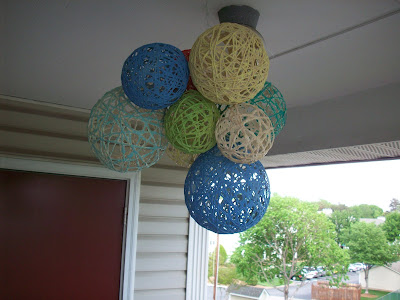
Balcony Chandelier
Today I'm going to be showing you my balcony chandelier. I have been cleaning up our balcony and preparing it for summer dinners, wine drinking evenings, and stargazing nights that will begin taking place as the weather warms up. This chandelier will bring life and party to my teeny tiny "backyard." Oh, and it follows my philosophy of easy, quick, and budget-friendly...I spent $0 on this little diy and I'm sure you have every material in your house, too!
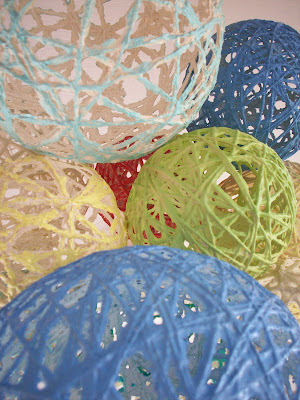
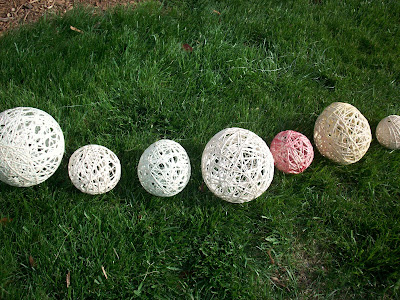
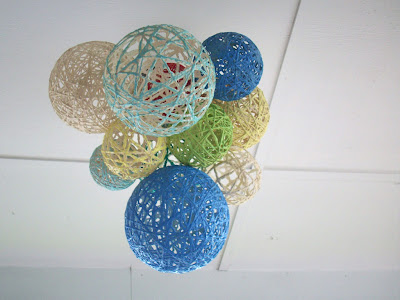
My chandelier is made up of eleven different sizes of string lanterns in a variety of fun colors that have been grouped together to hang from the center of the balcony ceiling. Are you ready to see some exciting and educational pictures that depict the crafting mania that surrounded the chandelier? I thought so!
This entire messy project can be summed up as paper mache with string. Notice I mentioned messy. I think this project was the messiest project I have partaken in (well, besides the oil-based primer nightmare that I don't like to think about)...so beware! To make the ooey gooey paste, you will need to mix together two cups of flour, 1/2 cup of elmers glue, 1/2 cup corn starch, and enough water to make a thick but slightly watery paste. Remember, the flour is what will be the main character in creating a rock solid lantern so don't water it down too much.
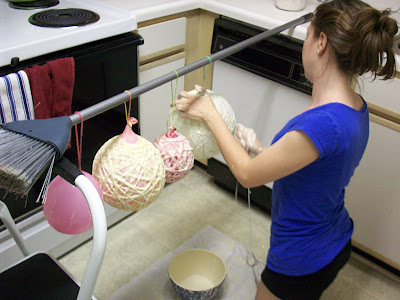
The next step is to hang blown up balloons somewhere where you can make a mess. I hung them from a broom that was balanced on a stool and the kitchen counter. Here comes the very first messy step: you will need to coat the balloons with either petroleum jelly (did this for my first batch and turned out well) or cooking spray (did this for my third batch and it worked excellent). This step ensures that the rock solid paste only sticks to the yarn/twine and not the balloon. I skipped this step on my second batch and bad things happened once it had dried.
Now, grab your string/twine/yarn and start dipping into your mixture and wrapping. I found that I could put a handful of twine in the bowl at a time, swish it around, and slowly wrap without creating a knot. I started winding top to bottom until I worked my way around the balloon, and then wrapped side to side. Feel free to wrap as much or as little as you'd like. I did a variety of amount of yarn and each lantern came out beautifully.
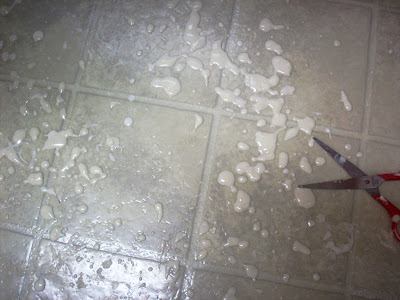
Like I said before: you will make a mess. Even if you put down cardboard or a trash bag or your dog, splashes of ooey gooey gunk will splatter on your counters, your floor, your legs, and even your hair.
Now comes the hard part - let it dry for 24 hours. This does not mean 12 hours (I tried) nor does it mean 19 hours (I tried this, too). The longer you wait, the stronger your lantern will be. When I messed with it too soon more bad things happened.
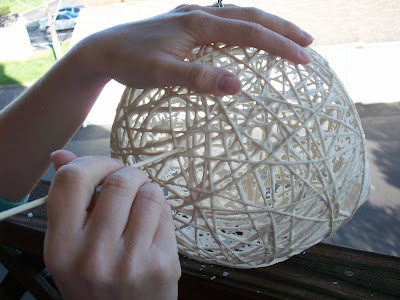
After your 24 hour drying time, you get to pop the balloon! Do this outside because when you pop it, shards of dried ooey gooey hard stuff will explode like a party with confetti. The following step is my husband's favorite: use your finger or a stick or a small knife and start poking the dried crystalized goop that formed between the yarn. Oh, and look below for a show and tell of what happens when you don't use an oily coating on the balloons. Told you - bad stuff.
Next, spray the lanterns with a clear protective coating; I used Rustoleum Clear Coating Spray.
In order to create a chandelier out of the lanterns, I tied fishing line to each one, knotted them together just so and hung them from a hook in our ceiling. Holding them up in front of our mirror to see how they looked was a lot easier than getting on and off our step ladder to view the mess of lanterns, just fyi.
I think all white lanterns would make a beautiful chandelier, but I wanted a festive feeling for our balcony so I made mine with colors reflected in our potted garden. Colored yarn worked well but created a muted color even when the original yarn was bold and loud. Spray painting and using craft paint worked well also and resulted in bolder colors. The two white lanterns you see are the natural twine color.
One last piece of advice - make more lanterns than you think you'll need. I started with just five and they looked pitiful. I made another three but even eight didn't create the focal point I was looking for. Eleven was the magic number.
I can't wait to finish up our balcony projects so we can relax and enjoy the summer from our little teeny "backyard".
Editorial Note: Here's yet another big THANK YOU to Jessica for having me over at My World - Made By Hand!
To see a list of who I regularly link to, including Today's Creative Blog, please visit Into Our Linky Parties
Labels:
budget craft,
chandelier,
craft,
diy,
paper mache,
tutorial
Wednesday, March 9, 2011
Mr. Blue Bird on My Shoulder
One thing that you will soon learn about me is my obsession with birds. Don't get me wrong, my house is not filled to the brim with bird-themed paraphernalia...yet. In an attempt to increase said bird-themed paraphernalia, I decided to create my own bird figurines. I had seen some at Michael's last week and began brainstorming how to sculpt a bird. Soon I was remembering third grade paper mache projects and realized how much more paper mache can do besides sculpt the solar system.
While I was googling a recipe for paper mache, I stumbled across a recipe for salt dough as well. My head spun out of control at the choice I had to make - flour and newspaper or flour and salt? Like with any major decision, I said, "Screw it - let's try both!"
Salt Dough Recipe:
(adapted from Arts and Crafts Ideas)
- 1 cup of salt
- 2 cups of flour
- 3/4 cup of lukewarm water
Mix the salt and flour together. Then add the water and mix until a ball has formed. Knead for 5-10 minutes or until dough is smooth and non-flaky. The quality of dough you finish with will depend on the time spent on kneading.
Paper Mache Recipe:
(adapted from about.com)
- 1 cup flour
- 2 cups water
- teaspoon of salt
I began my zippity doo da day of bird making (for those who don't get the reference, it goes along with my title) with the salt dough. After mixing up a batch of dough - I cut mine in half since this was an experiment - I got to work sculpting. Word of caution: I am not a sculptor, artist, or person-who-claims-they-aren't-good-but-really-are (you know who I'm talking about). That being said, I had a failed attempt and a successful attempt with the salt dough. Let me illustrate:
As warned in the recipe, you really must knead this well in order to achieve a smooth, flexible consistency. I found I needed to add a few drops of water to lubricate things. After the dough was where I wanted it, I took two clumps and shaped them into egg shapes.
My though process was that the larger egg would be the body and the smaller one would be the head. I thought I could just use a skewer to connect the head to the body. You'll also notice I cut out a beak and tail from cardboard and bent some paperclips to form legs.
This is the end of the pictures documenting the salt dough sculpture because this is where things began to get frustrating. My plans were not working - the dough is very heavy and the paperclips could not support the weight of the body. Sigh. The head was also very heavy and dug the skewer deeper and deeper into the body until it fell apart. I kept going with my little bird and here is how he turned out. Not what was envisioned in my mind.
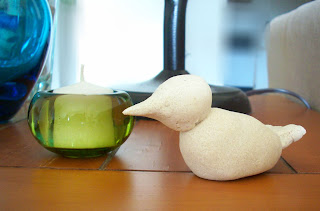
Immediately after shoving this one in the oven, I took a glob of leftover dough and started rolling it around. Please don't ask what I did next because when I came up for air, I was holding this sucker in my hand. Now, this is what I call success.
Oh, and speaking of oven, you should bake your salt dough creations on the lowest oven setting for 2-4 hours. My birds stayed in for 2 hours but had some wet spots still...which dried naturally overnight.
After my mixed salt dough results, I proceeded to get my hands dirty with some paper mache. I made a form out of crumpled newspaper in much the same way I tried my first salt dough bird...one larger egg shape with a smaller one for the head. I knew I wanted a cartoonish-figure to contrast against the more classic success bird above.
I took masking tape and wrapped it around to secure the newspaper into the shape I desired and then also attached the head.
I wasn't ready to give up on my desire to have a bird with legs so I cut a slit into the bottom of the body and slid the paperclip legs up in there. Then I took some small pieces of tape and taped between the legs to secure it in place.
The key was to keep bending the legs and toes to get the body perfectly balanced over the feet. I also cut out a beak and taped it on.
 |
| Isn't he cute? |
It is important to note that if you want a paper mache sculpture to last, you should only slather one or two layers of paper at a time and allow to dry between layers. This, along with the salt, minimizes risk of mold. I simply placed him on a plate with the salt dough birds on the warming setting of my oven.
 |
| So warm and toasty! |
After the paper mache bird is dry, I used fine grit sandpaper to lightly sand . He was then ready for another layer of goop. It is a long process, but I wanted my bird to stand the test of time, so I made sure it was completely dry between layers. I ended up doing four layers of paper and sanded in between each of them. This helped the paper to lay flat and minimized the roughness.
 |
| Good thing I had sandpaper - he is looking rough |
I ended up adding a tail at the last minute by layering several pieces of paper and then "glooping" it on. Of course, if you add a significant amount of weight to the body, you will need to tinker with the feet and rebalance the bird.
I think that I enjoyed making the paper mache birds more than the salt dough. I felt I was able to create different types of birds and personalities and had more control over the end product.
Now, I just need to figure out where to place my flock of birds.
I'm linking to:
Today's Creative Blog
Someday Crafts
Blue Cricket Design
Domestically Speaking
Paisley Passions
Katie's Nesting Spot
A Glimpse Inside
Somewhat Simple
Labels:
art,
bird,
budget craft,
craft,
diy,
nature,
paper,
paper mache,
salt dough,
tutorial,
upcycle
Subscribe to:
Posts (Atom)


