Showing posts with label chandelier. Show all posts
Showing posts with label chandelier. Show all posts
Monday, May 2, 2011
Balcony Chandelier
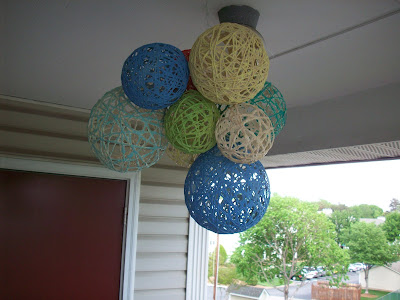
Today I'm going to be showing you my balcony chandelier. I have been cleaning up our balcony and preparing it for summer dinners, wine drinking evenings, and stargazing nights that will begin taking place as the weather warms up. This chandelier will bring life and party to my teeny tiny "backyard." Oh, and it follows my philosophy of easy, quick, and budget-friendly...I spent $0 on this little diy and I'm sure you have every material in your house, too!
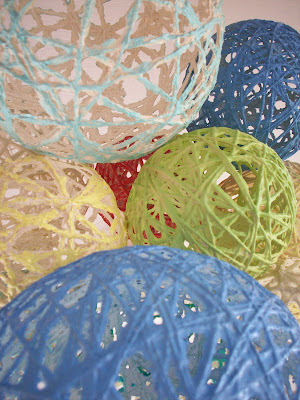
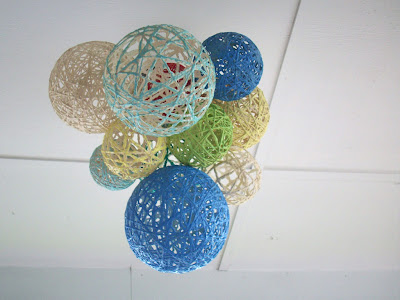
My chandelier is made up of eleven different sizes of string lanterns in a variety of fun colors that have been grouped together to hang from the center of the balcony ceiling. Are you ready to see some exciting and educational pictures that depict the crafting mania that surrounded the chandelier? I thought so!
This entire messy project can be summed up as paper mache with string. Notice I mentioned messy. I think this project was the messiest project I have partaken in (well, besides the oil-based primer nightmare that I don't like to think about)...so beware! To make the ooey gooey paste, you will need to mix together two cups of flour, 1/2 cup of elmers glue, 1/2 cup corn starch, and enough water to make a thick but slightly watery paste. Remember, the flour is what will be the main character in creating a rock solid lantern so don't water it down too much.
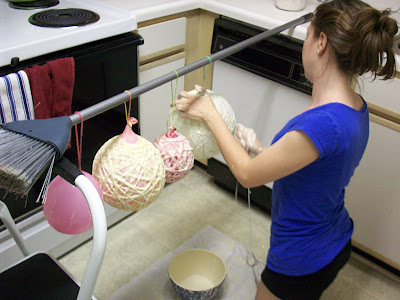
The next step is to hang blown up balloons somewhere where you can make a mess. I hung them from a broom that was balanced on a stool and the kitchen counter. Here comes the very first messy step: you will need to coat the balloons with either petroleum jelly (did this for my first batch and turned out well) or cooking spray (did this for my third batch and it worked excellent). This step ensures that the rock solid paste only sticks to the yarn/twine and not the balloon. I skipped this step on my second batch and bad things happened once it had dried.
Now, grab your string/twine/yarn and start dipping into your mixture and wrapping. I found that I could put a handful of twine in the bowl at a time, swish it around, and slowly wrap without creating a knot. I started winding top to bottom until I worked my way around the balloon, and then wrapped side to side. Feel free to wrap as much or as little as you'd like. I did a variety of amount of yarn and each lantern came out beautifully.
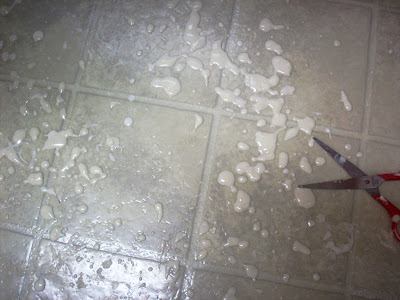
Like I said before: you will make a mess. Even if you put down cardboard or a trash bag or your dog, splashes of ooey gooey gunk will splatter on your counters, your floor, your legs, and even your hair.
Now comes the hard part - let it dry for 24 hours. This does not mean 12 hours (I tried) nor does it mean 19 hours (I tried this, too). The longer you wait, the stronger your lantern will be. When I messed with it too soon more bad things happened.
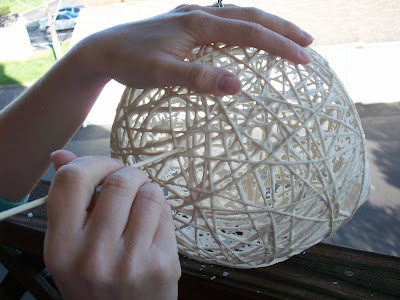
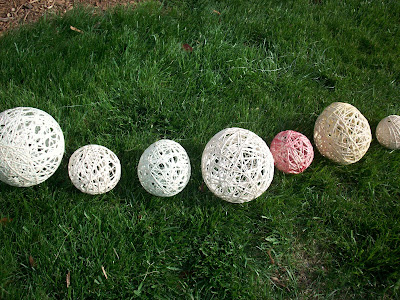
After your 24 hour drying time, you get to pop the balloon! Do this outside because when you pop it, shards of dried ooey gooey hard stuff will explode like a party with confetti. The following step is my husband's favorite: use your finger or a stick or a small knife and start poking the dried crystalized goop that formed between the yarn. Oh, and look below for a show and tell of what happens when you don't use an oily coating on the balloons. Told you - bad stuff.
Next, spray the lanterns with a clear protective coating; I used Rustoleum Clear Coating Spray.
In order to create a chandelier out of the lanterns, I tied fishing line to each one, knotted them together just so and hung them from a hook in our ceiling. Holding them up in front of our mirror to see how they looked was a lot easier than getting on and off our step ladder to view the mess of lanterns, just fyi.
I think all white lanterns would make a beautiful chandelier, but I wanted a festive feeling for our balcony so I made mine with colors reflected in our potted garden. Colored yarn worked well but created a muted color even when the original yarn was bold and loud. Spray painting and using craft paint worked well also and resulted in bolder colors. The two white lanterns you see are the natural twine color.
One last piece of advice - make more lanterns than you think you'll need. I started with just five and they looked pitiful. I made another three but even eight didn't create the focal point I was looking for. Eleven was the magic number.
I can't wait to finish up our balcony projects so we can relax and enjoy the summer from our little teeny "backyard".
Editorial Note: Here's yet another big THANK YOU to Jessica for having me over at My World - Made By Hand!
To see a list of who I regularly link to, including Today's Creative Blog, please visit Into Our Linky Parties
Labels:
budget craft,
chandelier,
craft,
diy,
paper mache,
tutorial
Subscribe to:
Posts (Atom)


