▼
Friday, April 29, 2011
Guest Blog: Balcony Chandelier
Today I'm guest blogging for Jessica over at My World - Made By Hand! Head on over there to see the chandelier I made for our balcony out of diy string lanterns...and then stay awhile and explore Jessica's blog because it's pretty awesome! Pssst, my favorite of her crafts is a sexy, sparkly wreath!
Wow, that's a lot of exclamation points! Can you tell I'm excited about my very first guest blogging experience!?
Thursday, April 28, 2011
It's a Bird, it's a plane, it's a....Branch?
Do you remember this picture I teased you with two weeks ago? Do you remember how we brought it home from a walk and I had big plans for it? Well, it has undergone quite the transformation over the past two weeks!
First we spray painted it a lovely spring green color.
Then we felt as though some branches would look better if they were moved. So, we took out the saw and some super duper glue and replaced a couple branches that just weren't living up to their full potential.
The bright spring green color looked beautiful in the day time. Our living room is naturally very dark and that pop of bright helped lighten up the dark television corner (remember my hatred for Ursula, our television console?) At night, though, that paint had a whole different personality. A glow-in-the-dark personality. It reminded me of the stars I had scattered around my ceiling as a teenager and I just couldn't stand it. So, we repainted a darker hunter green.
This hunter green was lovely and definitely less glowing...however I missed that pop of fun.
During the branch brainstorm, I had envisioned decorating the tree with tiny lights and red berries during Christmas, buds during the spring...so in order to help the hunter green color out a little, I made some origami leaves in bright, cheerful colors to adorn the branch.
It's just the pop I was looking for!
This branch is definitely outside my husband and I's comfort zone. We lean towards impressionism and landscapes when it comes to art and the branch seems as though it has a hint of modern flair. We love it though! What do you think? Is a painted branch perfect for bringing nature into your home and personalizing it or is it too bold and weird for you?
Wednesday, April 27, 2011
Finishing Touches
Today I have a bunch of finishing touches to do on these projects I've been keeping from you for too long. A little hint: I'll be making these today!
Stay tuned tomorrow for the unveiling!
 |
| Tutorial found at Bloomize |
Tuesday, April 26, 2011
Cork-aholic
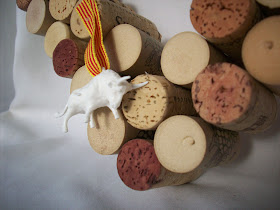
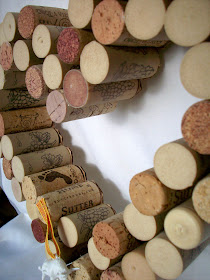
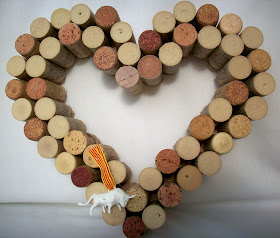
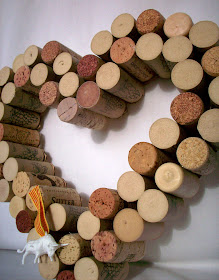
Yes, it's true, I love corks. I love their texture. I love their color. I love their wine stains. I love their branding. I love corks.
As you can imagine, with a love as passionate as mine, our cork collection is getting a little out of control. Last night while waiting for some paint to dry, some string to harden, and some stain to darken, I made a spur of the moment decision to tackle some cork art.
I may be so bold to say I love corks even more when they are heart-shaped. Now, to just figure out how to hang it on the wall...
Don't forget to check out my Linky Party page to see where I regularly party. I'm also linking to Today's Creative Blog today
Monday, April 25, 2011
Weekend Review
This weekend John and I went on the first camping trip of the season. We are describing it as simply "memorable." It was one of those trips where everything that could go wrong does...right up to the point where we got home and discovered our kitchen sink was left running the entire weekend we were gone. At least these pictures depict a good time.
I'm spending the day recuperating and finishing up a couple almost completed projects. I can't wait to share what we've been working on the past couple weeks with you!
 |
| Rain and 30 degrees the first night |
 |
| This scene makes me smile |
 |
| Beautiful view |
 |
| Warming up to the idea of camping |
 |
| Love |
 |
| Woodsy stroll |
 |
| Fish! |
 |
| Layla discovered she enjoyed fish |
 | |
| Gourmet dinner |
I'm spending the day recuperating and finishing up a couple almost completed projects. I can't wait to share what we've been working on the past couple weeks with you!
Friday, April 22, 2011
It's Not Easy Being Green...Or is It?
Occasionally I feel guilty that John and I aren't more "green". Living in an apartment, we aren't able to compost or easily recycle all recyclables. I look at other people and always feel as though I'm not doing as much as them. Today I decided to create a list of things John and I do to see if I really should feel as guilty as I do or if it's another of my irrational thoughts (just one of many).
After making this list I was able to see how easy being green is. You don't have to ride a bike 50 miles to work and only shop at Whole Foods to contribute positively to the environment. I thought I'd share the list I created with the hopes of showing you the small and easy things you probably do everyday to be green.
Living in an apartment hinders this a great deal, but we do tend to drape clothes over doors, showers, etc
2. Do not accept plastic bags
We have a pile of cloth bags in both of our cars - however I will admit we forget to bring them in time and time again
3. Recycle paper, cardboard, metal, plastic, glass
It's a little inconvenient to do this in our apartment, but I do upcycle most of these things...all glass and cardboard get hoarded away for future crafts.
4. Convert to all CFL light bulbs
We love CFLs - they save money and last forever
5. Turn off lights we're not using
Biggest pet peeve of mine
6. Turn off water while rinsing/brushing
7. Reuse gift wrap
. I always save all tissue paper, pretty wrapping paper, and gift bags from my presents
8. Run dishwasher only when full - and turn off dry cycle
Saves both money and water
9. Turn water heater temperature down
10. Recycle, freecycle, consign, donate instead of trash
12. Print on both sides of paper and re-use paper before recycling
We have a pile of scrap paper for notes or printing
13. Unplug appliances when not in use
We could be better with this
14. Use reusable water bottles
15. Use natural light for as long as you can in the evenings
16. Drive gently to get better mileage
I started doing this to save gas money in college and now it's a habit
17. Reduce hair dryer use
It's been tough, but I've broken my dependency
18. Grow your own vegetables
Our lettuce is almost ready for our first salad!
19. Flush less
23. Make homemade meals (less packaging)
We make all our meals from scratch
24. Buy bulk products & refill to reduce packaging
25. Wash and re-use ziplock bags
Occasionally we do this..
So, even if you don't ride your bike 50 miles both ways to work or or use only 2 cups a water a day or make everything you own out of recycled trash you can still feel good about being green. Being green doesn't have to be hard and that makes me happy because I look pretty good in green.
After making this list I was able to see how easy being green is. You don't have to ride a bike 50 miles to work and only shop at Whole Foods to contribute positively to the environment. I thought I'd share the list I created with the hopes of showing you the small and easy things you probably do everyday to be green.
Our Easiest 25 Green Habits
1. Hang laundry to dry.Living in an apartment hinders this a great deal, but we do tend to drape clothes over doors, showers, etc
 |
| The Alternative Consumer |
2. Do not accept plastic bags
We have a pile of cloth bags in both of our cars - however I will admit we forget to bring them in time and time again
3. Recycle paper, cardboard, metal, plastic, glass
It's a little inconvenient to do this in our apartment, but I do upcycle most of these things...all glass and cardboard get hoarded away for future crafts.
4. Convert to all CFL light bulbs
We love CFLs - they save money and last forever
 |
| Awesome Rossome |
5. Turn off lights we're not using
Biggest pet peeve of mine
6. Turn off water while rinsing/brushing
 |
| Terra Pass |
7. Reuse gift wrap
. I always save all tissue paper, pretty wrapping paper, and gift bags from my presents
8. Run dishwasher only when full - and turn off dry cycle
Saves both money and water
9. Turn water heater temperature down
10. Recycle, freecycle, consign, donate instead of trash
 |
| DoSomething.org |
11. Use cloth napkins
We just began this habit last year. Currently thinking of cutting down on paper towels for cleaning, too12. Print on both sides of paper and re-use paper before recycling
We have a pile of scrap paper for notes or printing
13. Unplug appliances when not in use
We could be better with this
14. Use reusable water bottles
 |
| Sustainable Living Group |
15. Use natural light for as long as you can in the evenings
16. Drive gently to get better mileage
I started doing this to save gas money in college and now it's a habit
17. Reduce hair dryer use
It's been tough, but I've broken my dependency
18. Grow your own vegetables
Our lettuce is almost ready for our first salad!
 |
| Gardening |
19. Flush less
Gross, yes, but it helps!
20. Keep heat at 59F in winter and 87F in summer
We do this mainly to save money
21. Clean with baking soda and vinegar
Just discovered this trick and am in love!
22. Shop at the local farmers market
 | |
| The Best of the South |
23. Make homemade meals (less packaging)
We make all our meals from scratch
24. Buy bulk products & refill to reduce packaging
25. Wash and re-use ziplock bags
Occasionally we do this..
So, even if you don't ride your bike 50 miles both ways to work or or use only 2 cups a water a day or make everything you own out of recycled trash you can still feel good about being green. Being green doesn't have to be hard and that makes me happy because I look pretty good in green.
Thursday, April 21, 2011
Fist Pumping and Confetti Throwing
Yes, there is some fist pumping and confetti throwing going on over here. There are also balloons, streamers, and party hats because I just received my 100th follower!!! (!!!!!!!!!) Little Brick Ranch is officially the 100th follower (we already celebrated via email together because I'm that excited)!
Thank you to every single one of my followers! I've loved getting to know you, commenting and emailing back and forth, and gaining support and advice. When I started this little blog a couple months ago, I thought I'd never even make it to 25 followers and here I am whooping it up with 100 readers! You guys rock my world!
Thank you to every single one of my followers! I've loved getting to know you, commenting and emailing back and forth, and gaining support and advice. When I started this little blog a couple months ago, I thought I'd never even make it to 25 followers and here I am whooping it up with 100 readers! You guys rock my world!
Oil-Based Nightmares
Do you mind if I share a horrific painting story with you today? You may need to put your children in another room so they won't have nightmares tonight. Let's call this story, "What's Lies Beneath the Lid".
Last weekend John picked up some much needed primer for several of our projects. Being overcome by the diy add virus (read about the symptoms here) I snatched up the quart of primer faster than Layla snatches up dropped food and started attacking some of our billion projects we have going on. Sure, in the midst of my crazed painting one part of my brain noticed the super duper strong smell and another part recognized how the paint was weirdly separated. I was in primer heaven, though, and couldn't be bothered with thoughts of anything other than majestic makeovers and creative crafts.
In order for you to fully grasp the horror of this story, you must know that when I paint, I get more than just messy - I get baby-eating-spaghetti kind of messy. My hands are coated, I wipe drips with my clothes, and inevitably paint finds it's way on my feet every single time. Needless to say, I was a hot mess after my priming party. Like always, I took the brushes and myself to our sink to start washing up. It's then that my brain started recalling my previous observations as I watched the water beading up and the paint smearing everywhere. Every.Where. Oh, and my brain also reminded me that I had forgotten to take off my wedding rings. Enter shrieks for John.
In between accusing John of conspiring against me by introducing oil-based primer into my water-loving life, I was begging him to yank the rings off my finger before anymore paint coated them. Let me take a brief break here to ask if anyone has ever had their husband attempt to remove their rings from their hands. It's hilarious in a normal situation, maddening in this situation. So, in the midst of taking off my rings, John became covered in paint and the rings looked like white porcelain instead of my beautiful jewelry. I instructed John to immediately head to another sink and start washing the rings while I sought to remove as much paint as possible from myself. If this were a horror film, the camera would be panning back and forth between me and John while focusing on our fear-stricken faces.
After several minutes I realized that the paint was not going anywhere...well actually, it was smearing everywhere but not disappearing. I headed into the bathroom to check on John and he was struggling as much as I was. I decided to pull out some sugar and olive oil - if I couldn't remove the paint, perhaps I could scrub off my painted skin. Eventually I was able to remove enough paint from my finger tips that I could take over ring duty.
Taking over ring duty was essential because John was freaking out as he realized he couldn't practice with paint-covered hands. He's in grad school for classical guitar and is busy preparing for a huge recital in a few weeks. My shrieks for help interrupted his precious practicing. The more he tried to get the paint off his hands, the more is just smeared around. Our kitchen and bathroom both looked like they were in the midst of demolition with water, paint, and paper towels spewed everywhere.
In order to protect you from further horrifying details, we will fast-forward 30 minutes. Eventually the sugar and oil mixture succeeded in removing our skin and the paint enough that we could calm down.
The point of this long story is to share my newly developed fear of our primer. It has sat on our balcony all week because I refuse to go near it and our paint brushes haven't been cleaned. Today I have a list of things that must be primed before I can finish the projects and I can't bring myself to open the primer. I'm scared of the horror that lies beneath the lid.
Apartment Gardening
Living in an apartment has some drawbacks when it comes to growing plants. In our last apartment we didn't have a balcony, but our abundant windows faced west and we were able to make due with small pots of herbs on our window sills. This year we moved into an apartment that has a great balcony...of course the drawback this time is the northeastern direction it faces. I guess we can't win but we can make due because that's the mantra in apartment living.
We are excited to try growing a vegetable garden for the first time ever this year! We started carrots, bell peppers, cayenne peppers, and lettuce out as seeds and they are all growing quite quickly! In an effort to be green and stay on budget, I fashioned some seed pots out of toilet paper rolls. They worked really well and I loved being able to just peel the paper off easily when it came time to plant the seedlings in larger pots. I always struggle with breaking roots when I pull teeny seedlings out of pots.
I will definitely be using toilet paper rolls next year to start seeds! They worked wonderfully!
Our young lettuce when it was just starting to sprout....look at it now!
I can't wait until we get our balcony cleaned up and pretty...now if we could just do something about the excess firewood we have. We do have one thing planned for some of it - stay tuned for a bench we are building with some leftover firewood!
We are excited to try growing a vegetable garden for the first time ever this year! We started carrots, bell peppers, cayenne peppers, and lettuce out as seeds and they are all growing quite quickly! In an effort to be green and stay on budget, I fashioned some seed pots out of toilet paper rolls. They worked really well and I loved being able to just peel the paper off easily when it came time to plant the seedlings in larger pots. I always struggle with breaking roots when I pull teeny seedlings out of pots.
 |
| DIY seed pots |
 |
| Lettuce |
 |
| Our lettuce today |
It's amazing how much more lettuce we find ourselves eating now that we have it growing on our balcony. I can't wait for the rest of the vegetables - we'll be the healthiest people ever.
 |
| Carrots |
I'm worried that we have too many carrots in too tight of quarters...what do you think?
 |
| Peppers |
I can't remember if these are cayenne or bell peppers. Guess it'll be a mystery!
 |
| Basil |
Basil and I don't get along too well. Typically within a couple weeks of growing it it dies horrifically. I'll keep you updated on this little guy.
I can't wait until we get our balcony cleaned up and pretty...now if we could just do something about the excess firewood we have. We do have one thing planned for some of it - stay tuned for a bench we are building with some leftover firewood!
Wednesday, April 20, 2011
Eggs-traordinary Candles: A Tutorial
Question: Why did the chicken cross the road?
Answer: To fill his shells with wax!
I'm sorry, I never claimed to be a comedian...back to our regularly scheduled program. As a child my favorite holiday was Easter. I loved everything about Easter from dyeing eggs and sleeping in curlers to the church service and Easter brunch. Many changes in my life have altered my current Easter traditions and I've spent several years feeling blue (a pastel-y blue to match Easter, however). This year I decided to embrace our current situation and simply make some new Easter traditions that I can love as much as the old.
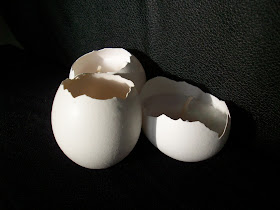
I got a little experimental with some new Easter crafts and decorations...such as the eggs-traordinary candles! I've been wanting to do something new with egg shells, something different than dyeing them or tissue papering them so I made them into candles. I was inspired by some ceramic egg candles I found and I think they turned out well. It was also a way to get rid of some nasty old candle bits that have been hanging out for way too long.
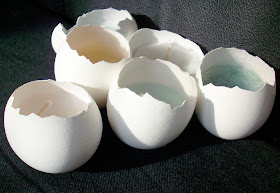
In order to gather the necessary egg shells, I made breakfast for dinner. Instead of cracking the eggs, I carefully pricked a hole into the shell with a knife.
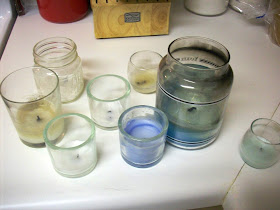
After gathering up some candles that had seen better days I placed them in a pot of shallow water and brought it to a boil. It doesn't take too long to melt the wax - the less there is the faster it takes, of course.
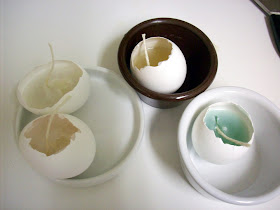
With a pair of tongs and some oven mitts, I carefully lifted the candle holder out of the water and poured the wax into an egg shell. You'll notice I used little bowls to keep the eggs upright so they wouldn't wobble all over the place. You shouldn't cry over spilled milk, but you should cry over spilled wax. Believe me.
For the wick, I took some twine, knotted the end, and soaked the whole thing in melted wax before placing it into the liquified candle.
After the wax hardened completely, I bent some paper clips into round shapes and glued them onto the eggs to keep them sturdy and stable.
I think these would be beautiful dyed and filled with white wax. Or kept white and filled with bright, colorful wax. I still have time before Easter...perhaps an omelet is in order...
Check out the Linky Party tab to see the awesome parties I link to regularly.
Tuesday, April 19, 2011
So in Love with Pinterest
My name is Kristen and I'm a pinterest-aholic. For the past two weeks, I feel as though all my spare time (and not so spare time) has been dedicated to drooling, dreaming, and lusting after the images I find on Pinterest.
Before I share my Pinterest with you, I want you to know I'm not liable for loss of productivity or anything that may come from loss of productivity (my husband has had to pick up the dinner-making slack since pinterest has come into my life).
Are you ready for an amazing world of beautiful pictures, amazing ideas, and jaw-dropping homes? Then enter Pinterest, my dream world. There is also a link on my sidebar to my page.
Decoupage Collage
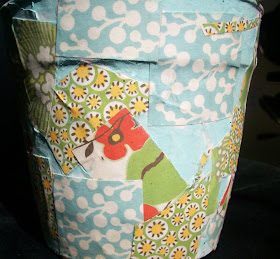
Last summer I bought several plastic pots from Target's clearance section. You can't beat $.60 for a pot, right? Fast forward a year and after the harps stopped playing as my irrational head-over-heels love for the cheap pots faded, I realized how ugly they are. I haven't filled them with anything because I didn't want them in my house. So, what began as a bargain 60 cents (times four pots) ended up being a waste of 60 cents (times four pots).
Well, I in the midst of a horrible case of DIY ADD (you should read all about the symptoms of this crafty virus to ensure you haven't caught the germ), I decided to do a little makeover. Mod podge plus pretty paper plus paint equals awesome pot makeover. Really!
Thanks to my insane inability to throw away scraps of beautiful paper, I was able to make a collage of sorts on the pot.
With all the random blank spots, I simply painted on my new favorite color of craft paint (Bird Egg) and voila!
I started these flowers from seeds and now I can't remember what type of flowers they are. Guess we'll be surprised when they bloom!!
Check out the Linky Party tab to see what parties I link to regularly!


