Showing posts with label John's Post. Show all posts

Thursday, July 14, 2011

Tools Make the DIYer

With the right tools, not only can you make all of your DIY dreams come true but you can also do it in a fraction of the time.  While I have dreams of filling a shed with every power tool my wife would let me purchase, right now we simply do not have the room for them.  However this means I either have to borrow the tool from a friend, or simply own a couple of the best and most versatile tools for any job. 

I have put together a list of the 5 most important tools one can have as a DIYer.  Not only have these tools allowed me to accomplish most of the things my wife asks me to do but they cost very little money.  Plus they pay for themselves with the time and energy saved. 

via


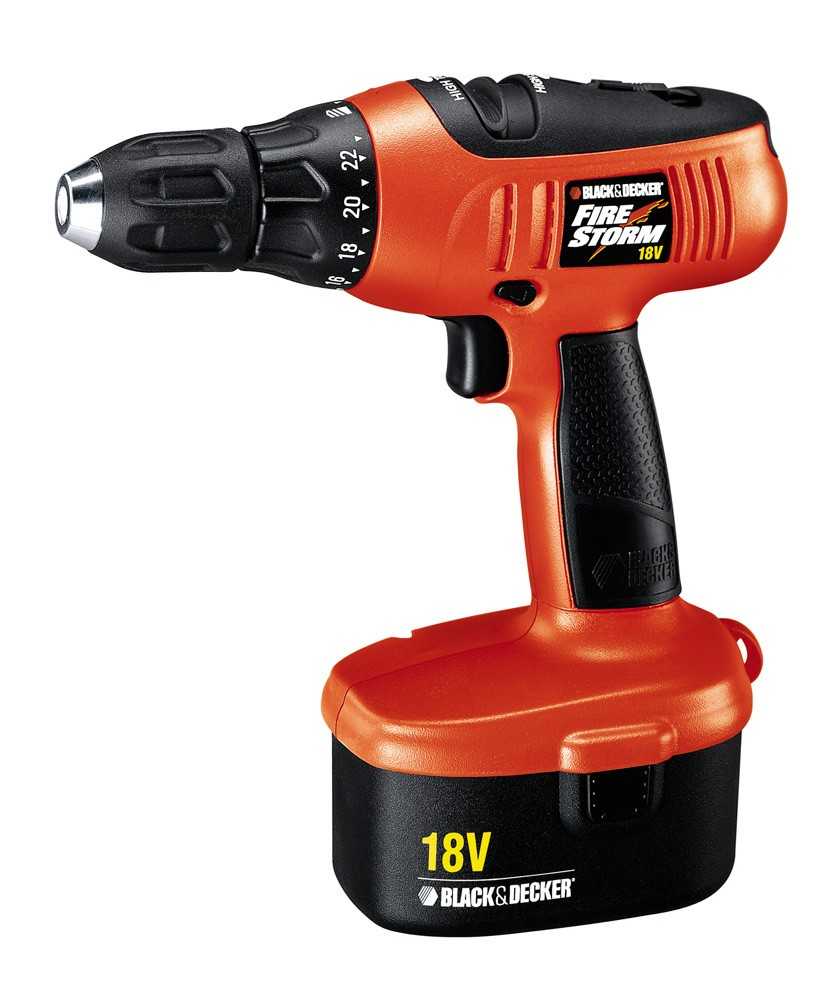
#1 Cordless drill
If you do not own a cordless drill by now then do your self a favor and when you are finished reading this, GO PURCHASE ONE!  I think I use mine every other day.


via

  #2 A Decent Hammer
Trust me there is such a thing as a bad hammer.  You won't know it until you pick up a GREAT hammer. 


via

#3 Hacksaw
Whether you need to cut PVC, galvanized pipe, copper, a stripped screw, anything, a hacksaw can get the job done.  You can even use it to cut very small pieces of wood although I would not use it for wood that is very thick as you will be there for a long time.  You can purchase one under $10 and replacement blades are much cheaper. 


via

#4 Electric sander
At just under $30, this little guy will save your wrists from aching after sanding your dresser before refinishing it. 


via

#5 A good Multi-tool
Just like Les Stroud, I never leave home without it!


via

A close runner up would have to be my laser level.  This tool has helped keep many of our pictures in line and level on the wall as well as make sure shelves and tables that we build are level.


 Did I miss anything?  Do you have a different list of essential tools?

 - JOHN

Wednesday, July 13, 2011

Crafty with Corks


As you have probably seen from my wife's posts, she is very creative with wine corks (you can see some past projects here and here).  We have saved them up over the years and she has come up with many interesting things to do with them.  I decided I wanted to give it a shot to see if I could also be as crafty with corks. 

I recently saw you could purchase a kit to make trivets out of wine corks.  This seemed a little ridiculous to me, especially when I saw the price of said kit.  I figured I may as well give it a shot and trying making a cork trivet using only the supplies we had on hand...making it essentially free. 

To start, I played around with the placing of the corks until I found a design that I thought looked nice.


I then glued a couple corks at a time to each other and clamped the corks while the glue dried.
 

*WARNING* Only use a small amount of Gorilla Glue!


Have you ever used Gorilla Glue?  This was my first time.  I have used many adhesives but never Gorilla Glue.  It's pretty great stuff and amazing at adhesion, but like I said, ONLY USE A SMALL AMOUNT.  I ended up with Gorilla Glue all over my hands and I could not get it off for at least a day.  Worst, Gorilla Glue expands as it dries and when used in excess, takes over your cork trivet project.


The glue worked quite well with the corks, however, and they were extremely secure.  Once I had the design completely glued together, I decided it needed some feet to add some additional interest and, well, feet.  I cut 2 wine corks in half lengthwise and used them as a base to raise the trivet slightly.


There we have it - a cork trivet made without a $40 trivet kit!


 - JOHN

Tuesday, July 12, 2011

PVC - Pipe is Very Cool


I know, I know!  That was a horrible acronym.  I did not want to just say Polyvinyl Chloride.  PVC pipe is a wonderful thing however.  Not only does it funnel your used water away from your house but it also is cheap and great for building various crafts.  I thought today I would share some of the many things you can make out of pvc.

The first non-aquatic project I used PVC for was to make a ladder golf set several years ago. Sets were being sold for exorbitant prices and friends had sets made out of wood but I decided to make one for $15 out of PVC.


The most recent project came from an issue that arose last week that I realized I no longer had a small microphone stand for recording.  I told Kristen I was headed to the music store to purchase one.  She said, "Why do you need to buy one?"  I responded, "I need a small microphone stand low enough to record guitars, guitar amplifiers, kick drums, etc."  She said, "You can't build one?"  Something about that statement screamed CHALLENGE to me.  Of course I CAN build one, I just don't want to take the time to build it when I need one NOW.  After a quick google search and a few thoughts I realized I could stick with my trusty friend Mr PVC!  I realized that not only would it be cheaper, but the music store is 40 minutes away and Home Depot is only 4.  I could go to Home Depot, purchase PVC, come home and cut the pipe and put it together in probably less time than it would take to drive to the music store.  Challenge excepted!


Supplies:
10 ft 3/4" in PVC
4 - 3/4" couplings
3 - 3/4" tees
1 - 2' 1/2" PVC 


I cut the 10 ft pipe into 1 - 19 inch section, 4 - 6 inch sections and 2 - 4 inch sections.  The longer 19" section serves as the height for the microphone.  The shorter sections were cut to be a base for the stand.  I used the coupling for the feet and the tees connected them all.


The 1/2" pipe fit into the 3/4" and I can slide it up and down for easy height adjustments.  I used some epoxy and attached an old microphone holder to it to hold a microphone in place.  I drilled holes through the pipe so I could stick a small dowel through to hold a microphone at various levels.  Unfortunately, I could not find a small dowel around our house so I found a small screwdriver that would work well and now he is doing two jobs for the moment!


Once assembled, we spray painted it black.  Although I plan on only using this for recording purposes and it probably will never see anything but a studio, the black looks a little classier than a white pipe with "Charlotte Pipe" written all over it.


Though I have misplaced my receipt, I know that I spent under $8.00. The cost of feeling like you won a challenge and saved money and time however, is priceless!


I have a feeling using this won't be the last time I use PVC for an awesomely creative and dirt-cheap project.  Speaking of awesomely creative, I recently came across this project - check out those kids playing in the awesome sprinkler! 


via

This fishing rod holder is pretty awesome.  I have not done anything quite this extensive.  You can also make a great fly rod case out of pvc.  This is very helpful when traveling especially if you have to bring your fly rod on an airplane.  This website shows you how to make it very easily.  The best thing too is that it costs under $5 which is a fraction of what most fly shops would charge...it would be an awesome Father's Day gift!


Do you have any cool PVC designs you use?  Maybe you have some much cooler acronyms at least.  Please share!  If you're interested in other amazing PVC possibilities, this website has amazing ideas and inspiration.

 - JOHN

Monday, July 11, 2011

The Parsimonious Penny Pincher

Hello Turning a House into a Home readers, I am Kristen's husband John.  My wife has inspired me to take on some of my own diy projects lately and she has asked me to share some of them with you throughout this week.  I used to consider myself a cheap person.  That is, until I married my wife.  Frugal is an understatement when I describe her spending habits.  A parsimonious penny-pincher I think is a more accurate description (sweet alliteration, I know!).  I have friends with spouses that are big spenders and live outside of their means.  We definitely do NOT have that issue in our household.


One of the many things that my wife's frugal habits have shown me is that the small patch of woods behind our neighborhood is an untapped resource of creativity and a beginning to many diy projects.  It is the same as modeling clay is to a sculptor or blank canvas to a painter.  I will frequently make a "woods run" for more supplies (Yes, our neighbors do think I'm crazy as they stare at me and wonder why this man frequently carries branches back to his 3rd floor apartment).

When Kristen needed a new plant stand on our balcony, did I go to Home Depot?  Of course not!  I made a woods run!


I searched the woods until I found the right branches that I wanted to create a plant stand.  I wanted straight, long sticks that would work for the top and legs for the stand.  I also wanted some smaller pieces for supports.  All the wood I used I found on the ground and did not cut anything from a tree.  At the same time I did not want anything that had been down very long as it may have started to rot.  Once I had some supplies, I was ready to cut!

I began by cutting the branches into smaller pieces for the legs and the top.  Now, normally I like to plan how I'm going to make a project.  I will draw diagrams, look up different ideas, make very careful measurements.  With this project, I totally improvised everything as I went along.  In hindsight, this was not the best idea and I definitely could have benefited from a little more planning.  In fact, I ended up starting from scratch half-way through the first try.


Also, if you ever do this, use a miter block or a chop saw.  Your cuts will be much straighter than mine and
the time it will take will be drastically reduced (especially with the chop saw).  I did however know how large I wanted the top to be.  I wanted the top to be 12"x12".  I cut 2 - 10" sticks that I could secure the top to then I cut 9 - 12" sticks that I glued to it.  The legs were all cut at 14".  


Once I had my top and legs cut, I glued the top together.  I used screws to fasten the legs to the top.  From there I screwed in some supports.  The side supports I drilled holes into the legs that the supports could fit into and slid them in with a small amount of wood glue.  Overall I used four screws, some wood glue, and some gorilla glue to fasten the wood together.  I did not want to use too many screws as I think they take away from the overall natural look.


We now have a rustic plant stand for our growing container garden on the balcony. We have yet to decide if we want to stain it to match the bench we built out of branches as well or if we'd rather leave it natural.  Not only is my wife happy with the end product, the plants are loving it, too.


 - JOHN

LinkWithin

Related Posts Plugin for WordPress, Blogger...